

Discover what the Meta pixel is, why it’s crucial for everyone who runs Facebook ads, and all you need to know to use it effectively.
The Meta pixel (formerly Facebook pixel) is currently being used by almost 4 million websites around the world.
Now you’re probably asking yourself – how could this little pixel become so popular?
Read further to discover what the Meta pixel is, why it is so important for everyone who runs ads on Facebook, and basically, everything you need to know in order to use it to your benefit.
What is Meta (Facebook) Pixel?
Simply put, the Meta (formerly Facebook) pixel is a Javascript code that you add to your website in order to track visitor activity.
The Meta pixel is an analytics tool that helps you measure and increase the effectiveness of your advertising campaigns.
This is done by reporting and analyzing the actions people take on your website. The pixel uses this data to assign people to different target groups you can engage with ads in the future.
In this chapter, I’ll explain what the Meta pixel actually is and will share with you a bit of its history. We’ll also go a bit into technicalities, but not too deep, so don’t worry.
The pixel “fires” when someone takes an action on your website, which is one of these you ordered it to track.
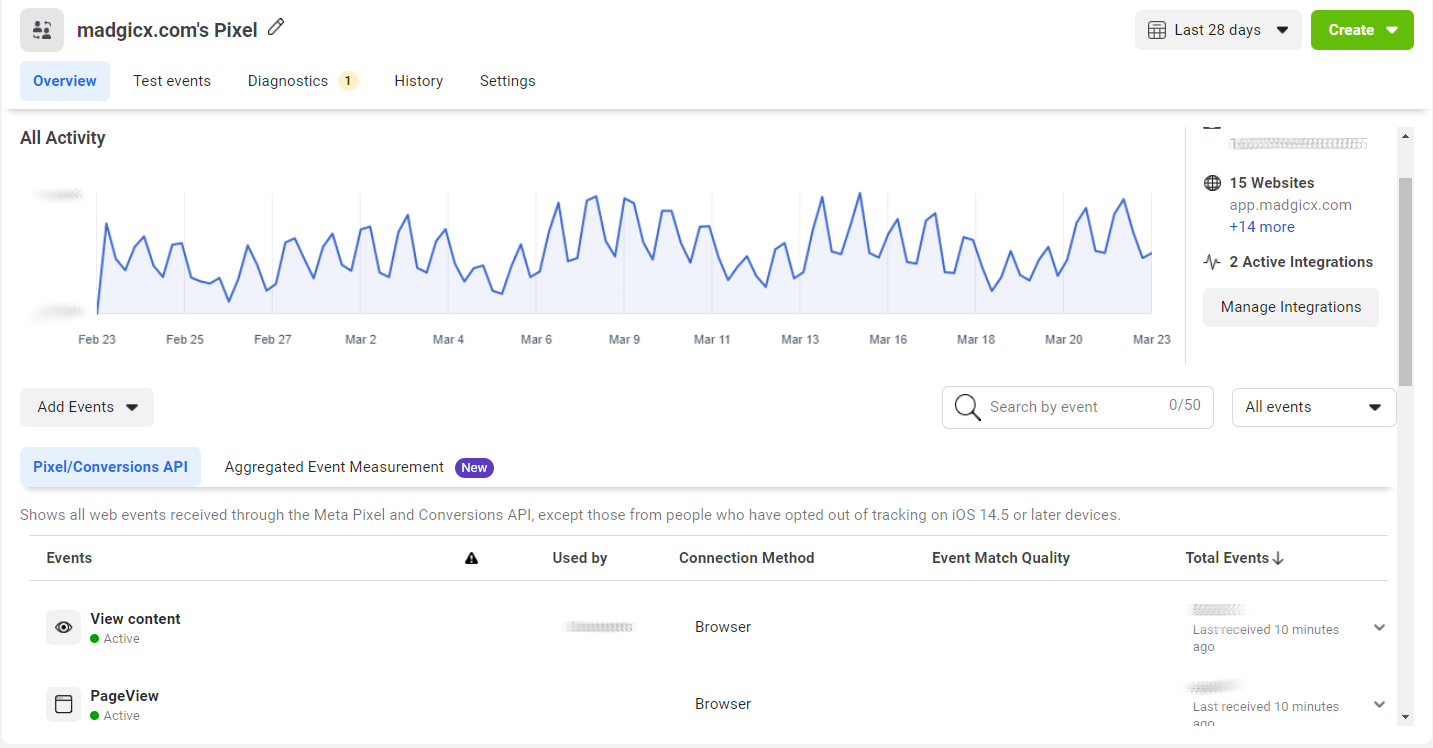
You can view all these actions on your Meta pixel page in the Events Manager. You can also use this data, later on, to advertise to people who visited your website. That’s called Retargeting.
Why is the Meta pixel called “pixel”?
The term “pixel” was not coined by Facebook. Tracking pixels and pixel advertising have already been around for quite some time.
Initially, this solution was used for email marketing and was referred to as a “web beacon“. Nowadays, it became a standard in many online advertising platforms.
A tracking pixel is a graphic with dimensions of 1×1 pixels that is loaded when a user visits a website or opens an email. It’s so small that it’s barely noticeable.
These tracking pixels were originally partly or fully designed to be transparent or camouflaged in the background color of the website so that they don’t stand out to users.
The tracking pixel URL is the memory location on the server. When the user visits a website, the image with the tag is loaded from this server.
History of the Meta (Facebook) pixel
In 2013, Facebook released two kinds of pixels:
- Website Custom Audience Pixel for retargeting website visitors (AKA Facebook Retargeting Pixel or Facebook Remarketing Pixel)
- Facebook Conversion Pixel for tracking website conversions (e.g. sales)
You could only create one Custom Audience Pixel per Facebook ad account, but many Conversion Pixels – one for each web page you wanted to track conversions on.
In 2015, Facebook made it all more simple and convenient by merging both kinds of pixels into a new and improved Facebook pixel.
In 2017, the Facebook pixel was updated again to include more tracking options, such as button click activity and page metadata. Facebook also discontinued the Conversion Pixel that year.
In January 2022, after turning the Facebook company into Meta, the company changed the pixel name to “Meta pixel.”
The Meta pixel code
As I already mentioned, the Meta pixel is simply a snippet of Javascript code that you embed into your website.

It relies on Facebook Cookies, which enable Facebook to match your website visitors to their respective Facebook user accounts.
How does Meta pixel work?
It loads a small library of functions that you can use whenever a website visitor takes a specific action that you want to track. These actions are called “conversions” and they are interpreted by the pixel as “events”.
These events can be Page Views, Add-to-Cart, Purchase, Scroll Depth, Time on Page, and more.
The pixel tracks URLs visited, domains visited, and devices your visitors use.
You can view all your tracked conversions in the Facebook Ads Manager and the Facebook Analytics Dashboard.
This will help you to measure the effectiveness of your Facebook ad campaigns, create custom audiences for Retargeting, set up dynamic ad campaigns, and analyze your website’s conversion funnels.
Requirements
In order to implement the Meta (Facebook) pixel on your website, you will
need:
- Access to your website’s codebase.
- Your Pixel’s base code or its ID.
- Access to the Facebook Ads Manager.
If your business operates in the EU, you also have to comply with the General Data Protection Regulation (GDPR).
Why you should install the Meta Pixel
Frankly, without the pixel you are shooting in the dark, so why not help Meta help you?
As data becomes more and more important every day, it’s crucial to have a strong integration between your website or eCommerce shop and Meta (and any other “walled garden” ad platform).
This data can help you create better Facebook ads and improve your audience targeting.
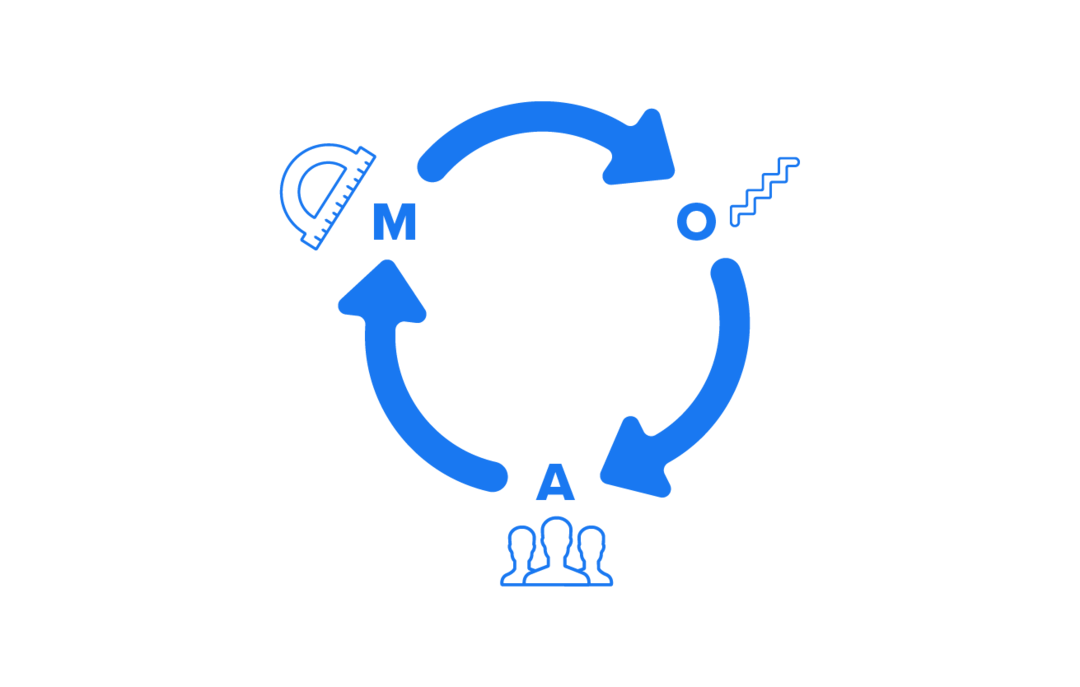
In this chapter, you will learn about the importance of the Meta pixel in 3 areas: audience creation, measurement, and optimization.
What does Meta pixel do?
Audience Creation
The pixel helps you find new customers and retarget people who have visited a specific page or taken a desired action on your website.
You can use your pixel data to create Retargeting campaigns and dynamic ads. For example, if a customer has abandoned an item in their cart or added it to their wishlist, you can show them a dynamic ad presenting the same item.
You can also create custom audiences of people who have already taken the desired action (such as a subscription) in order to exclude them from your Retargeting campaigns. This will save you money and make sure you’re not annoying people with ads asking them to take actions they already did.
Using your pixel data to create lookalike audiences, which include people who have similar characteristics to your customers and website visitors, is also crucial for expanding your customer base.
One of the biggest advantages of creating pixel-based lookalike audiences is that they update automatically, which means they remain relevant for cold traffic campaigns.
Measurement
With the Meta pixel, you can understand the impact of your ads much better by monitoring people’s reactions to them. The pixel shows you how people interact with your website after seeing your ads. It even tracks them across different devices. For example, customers might have seen your ad on mobile and made the purchase on their desktop.
To track ad attribution correctly, make sure you set up the right Meta pixel URL parameters when launching your ads. You can follow your customers’ behavior along every stage of your marketing funnel, from Acquisition through Retargeting to Retention.Your pixel data includes critical metrics such as Return on Ad Spend (ROAS), Cost per Purchase (CPP), and Cost per Lead (CPL), which you can’t track efficiently without it.
This information is crucial for refining your advertising strategy, especially in terms of full-funnel targeting and omnichannel marketing.
Optimization
The pixel allows you to set up automatic bidding to reach people who are more likely to take an action you’re interested in, such as making a purchase. Facebook has a ton of data about its users. Hence, in order for Facebook to find the people who are most likely to convert, all you have to do is ask – set up “conversions” as your campaign objective.
You can optimize for different conversions based on your business model, whether it’s purchases or sign-ups. You can also optimize your campaigns for value, which means that Facebook will show your ads to people who are more likely to make high-value purchases.
In conclusion, installing the Meta pixel will help you increase your conversion rate and your ROAS on Facebook ads.
Pro Tip: Even if you’re not running Facebook ads yet, you should install the Meta pixel on your website.
This way, the pixel will start collecting data on your website visitors right away, so you won’t have to start from scratch when launching your very first Facebook ads
How to create and install a Meta pixel
Now that you already understand what the Meta pixel is and how important it is to add it to your website, I’ll explain how you can create and install it on your site.
In this chapter, I’ll take you step-by-step through the whole process from creation to Meta pixel setup. I’ll also use a lot of screenshots to make things clear, so don’t you worry about a thing!
Before we start, there are two things you need to have:
- A website for your business
- Permission to update your website’s code
If you don’t have a website, that’s definitely going to be an issue.
If you have no permission to update your website’s code, either ask your administrator to grant you permission or let them do the installation for you. Once we’ve cleared these out, we can start and create your new Meta pixel. No worries, it’s a pretty simple process.
How to create a Meta pixel?
Go to your Facebook Events Manager.
On the left side menu, click “Connect Data Sources”.
Select “Web” and click “Get Started”.
Select “Facebook Pixel” and click “Connect”.
After reading how the pixel works, click “Continue”.
Give your pixel an indicative name. Try something more creative than “My Pixel”.
Enter your website URL to check for easy setup options.
Click “Continue.”
Add the Meta pixel to your website
Once your new pixel was created, it’s time for the Meta pixel setup on your website.
- Go to the Facebook Events Manager.
- Select your pixel.
- Click “Continue Pixel Setup”.
At this stage, you have 3 possible ways to continue: manual installation, using a partner integration, or sending the instructions to your website administrator.
Manually add the Meta pixel code to your website
Select “Install Code Manually”.
Copy the pixel base code.
Find your website’s header or locate the header template in your CMS or web platform.
Paste the base code at the bottom of the header section, just above the closing head tag.
Click “Continue”.
At this stage, you can turn on “Automatic Advanced Matching” and verify the customer information you want to send. This is only optional and I’ll explain more about it later on.
Click “Continue”.
Add Events using the Events Setup Tool or by manually adding the relevant code to your website. More about Meta pixel events later.
Click “Done”.
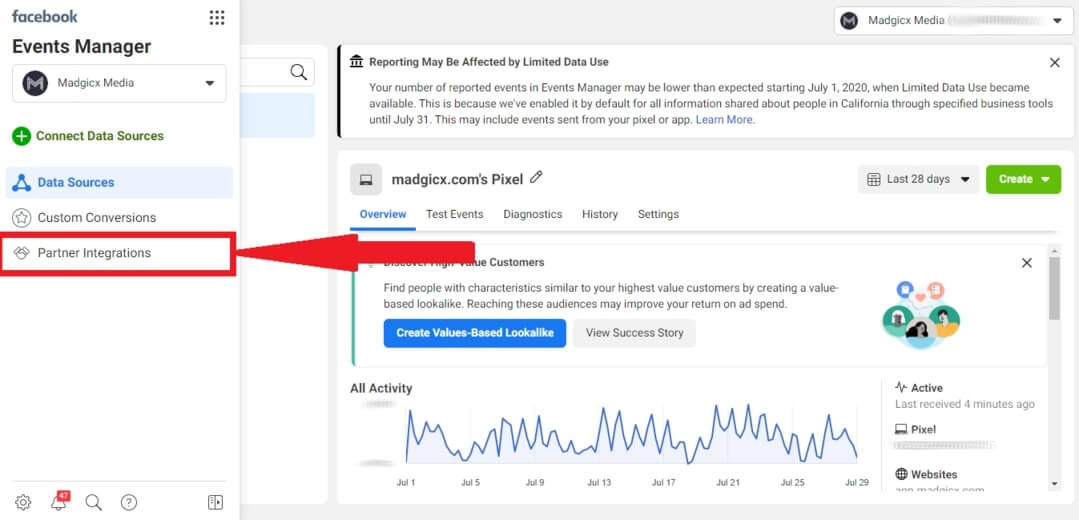
Use a partner integration
- Click “Use a Partner”.
- Select the relevant partner from the list.
- Follow the on-screen setup instructions.
Alternatively, you can go to the Partner Integrations page in the Facebook Events Manager, select your partner, and follow the on-screen instructions.
Facebook has integrations for multiple eCommerce platforms, such as:
- Shopify
- Magento
- Woocommerce
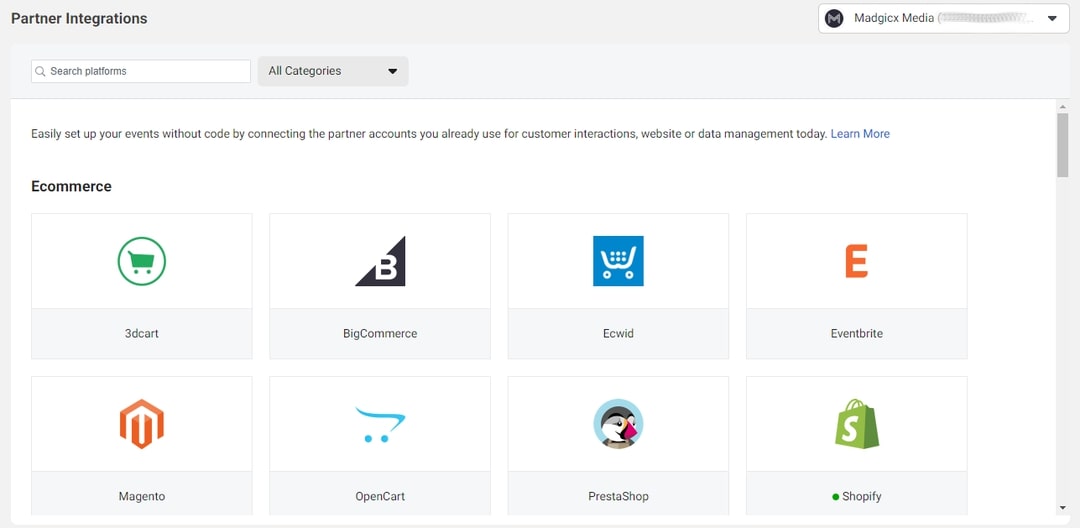
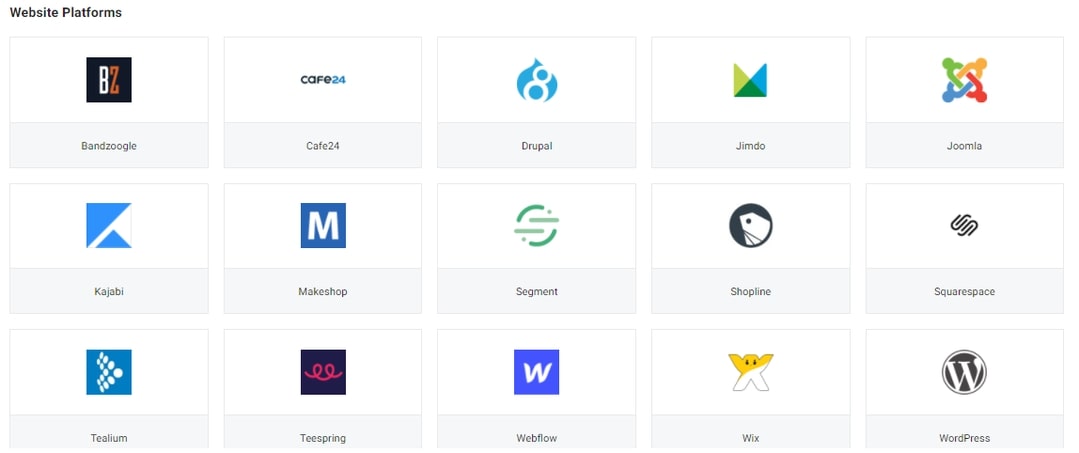
Facebook also has integrations for various website platforms, including:
- WordPress
- Wix
- Squarespace
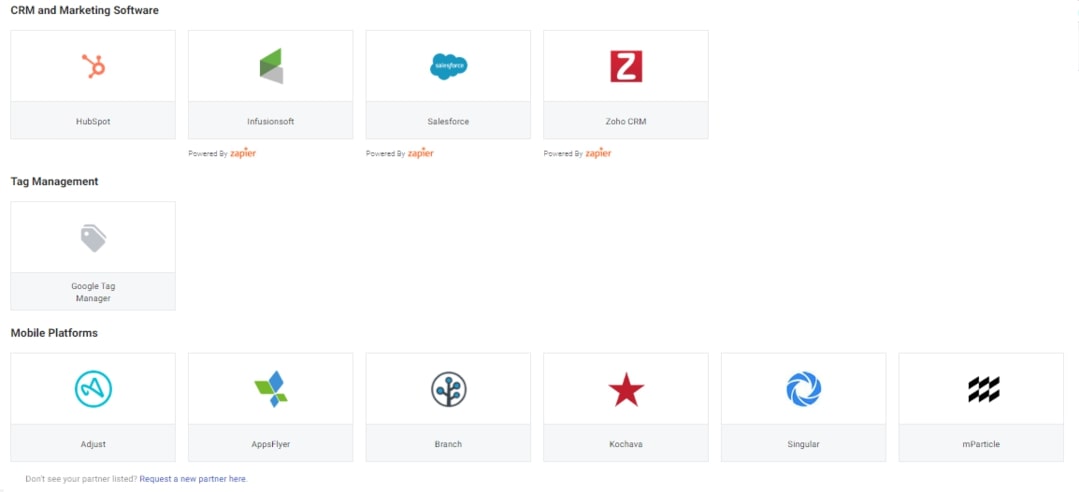
In addition, Facebook has an integration for Google Tag Manager and for many customer data platforms, data connection platforms, CRM and marketing software, and mobile platforms.
Send instructions via email
If someone else, such as your web developer, will be doing the Meta pixel setup on your website for you, you can easily send them the instructions by email.
This is how you do it:
Click “Email Instructions”.
Enter the recipient’s email address.
Click “Send” at the bottom of the page.
How to find Meta (Facebook) pixel ID?
Now that you have a Meta pixel (Hooray!), what happens if you want to connect it to another platform?
All you need is your Meta pixel ID!
You can find it in the Facebook Events Manager on the left side of the screen under your pixel’s name.
Meta pixel events
The next step, after creating and installing the Meta pixel on your website, is setting up your desired events. These events are the actions you wish to track on your website.
In this chapter, we’ll discuss standard events, custom conversions, custom events, and offline events. I’ll explain how you can set up each one of them and provide you with some tips regarding the events you should be tracking.
You can either set up Meta pixel events manually using the relevant event codes or via Facebook’s Event Setup Tool.
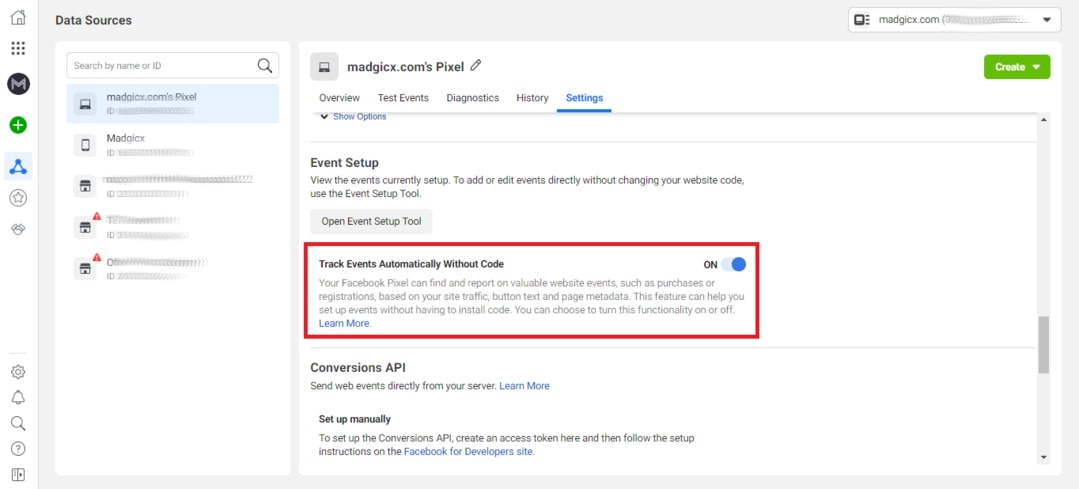
Note that you can also turn on Automatic Events, which allows your Meta pixel to automatically track valuable events, such as purchases and registrations, without having to set them up.
Automatic Events will be de-duplicated from any other events you have manually set up.
In order to enable Automatic Events, just go to the “Settings” tab in the Facebook Events Manager and toggle on “Track Events Automatically Without Code.”
How to set up events using the Event Setup Tool
Go to the Facebook Events Manager.
Under the “Overview” tab, click “Add Events”. Alternatively, you can tap into the “Settings” tab, scroll down to “Event Setup,” and click “Open Event Setup Tool.”

Select “From the Pixel and then click “Open Event Setup Tool”.
Enter your website’s URL and click “Open Website”. Make sure you write the full URL with HTTP(s) in the beginning.
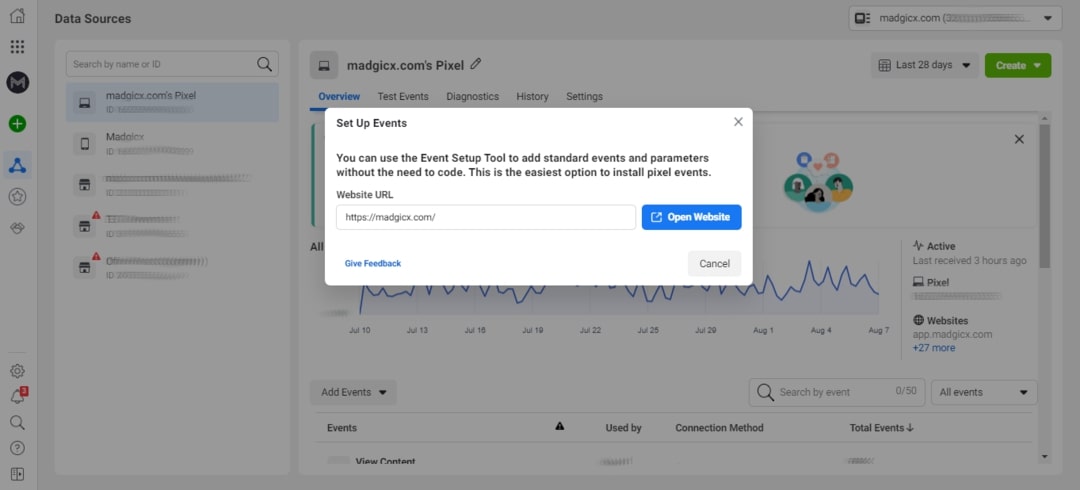
The Event Setup Tool should open up on your website. If it doesn’t, try turning off your ad blocker.
You can now go through each page on your website and add a button click or URL tracking. You can also view the details of your existing events, edit, or delete them.
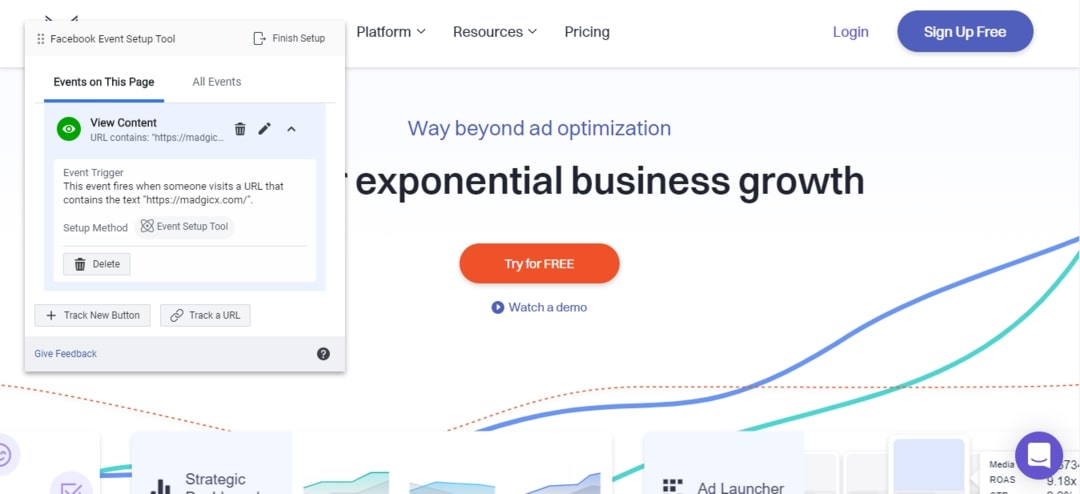
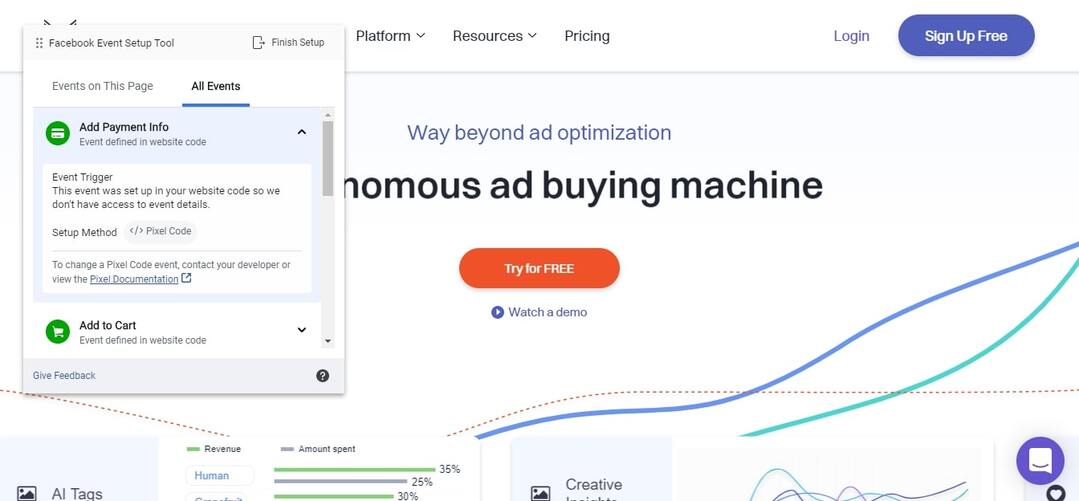
You can also tap into the “All Events” tab to view, edit, or delete events you set up on other pages on your website.
Note that if you set up an event manually in your website code, you won’t be able to view its details, edit, or delete it using the Event Setup Tool.
Once you’re finished, you can either click “Finish Setup” or go back to the Events Manager and click “Disconnect”.
Meta pixel standard events
Meta has already prepared a list of standard events that you can track:
Add Payment Info: The addition of billing information, such as a credit card, during the checkout process.
View Content: A visit to a web page that is important to you, such as a product or a landing page. This event only tells you that someone visited a specific URL, but not what they did or see on the page.
Add to Cart: The addition of an item to a shopping cart or basket.
Add to Wishlist: The addition of an item to a wishlist.
Complete Registration: A submission of information by a customer in exchange for a service provided by your business, such as signing up for your email list.
Contact: A phone call, SMS message, email, chat conversation, or any kind of contact between a customer and your business.
Customize Product: The customization of a product via any kind of configuration tool or app your business has.
Donate: A donation made to your organization or cause.
Find Location: When a person finds one of your locations with an intention to visit. For example, searching for a product on your website and finding it in one of your stores.
Initiate Checkout: The start of a checkout process.
Lead: A submission of information by a customer with the understanding that they may be contacted by your business later on. For example, signing up for a trial.
Purchase: The completion of a purchase, usually signified by receiving purchase or order confirmation, or a transaction receipt.
Schedule: The booking of an appointment to visit one of your locations.
Search: A search performed on your website, app, or other property.
Start Trial: the start of a free trial of a product or service you offer.
Submit Application: The submission of an application for a product, a service, or a program you offer, such as a credit card, an educational program, or a job.
Subscribe: The start of a paid subscription for a product or service you offer.
But when would you like the pixel to register these events?
You have two possibilities: on page load and on an inline action.
When is it better to register an event on page load?
When the event is complete once the website visitor gets to a new page.
For example, when you have a “Thank You” or confirmation page after the visitor completed the sign-up process or a purchase.
When is it better to register an event on inline action?
When the action is complete once the visitor clicks a button, such as “Add to Cart.”
You can also use this option if you don’t have a dedicated confirmation page for subscription or purchase.
Which standard Meta pixel events should I track?
That depends on your business model.
Do you have an eCommerce business? Are you a SaaS company?
You should understand your marketing funnel first, and according to that, you need to make sure you install all the relevant pixel events across the funnel.
Each step of your funnel should trigger an event. This will help you optimize your ads later on.
eCommerce business events
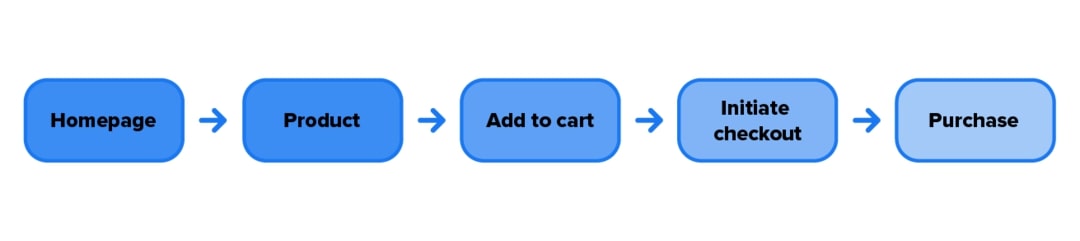
Let’s follow the most common process your customers go through on your website:
In that case, the essential events for you are:
View Content: You’d like to set your pixel to register this event when a visitor views your homepage or a product page. You’d like to set this event to fire on page load. If you have category pages, you can set this event for them as well.
Add to Cart: This event will be registered when a visitor clicks any “Add to Cart” button on your website and should fire on an inline action. If you use a wishlist on your website, you can also set up the event Add to Wishlist.
Initiate Checkout: This event should also fire on inline action when a visitor initiates checkout.
Add Payment Info: You can set up this event to fire on inline action when the customer clicks “Save” after adding their payment info, or when the next page in the purchase process loads.
Purchase: This event will fire on inline action once a visitor clicks “Complete Purchase” or on page view if you have a “Thank you”/purchase confirmation page.
Lead generation events
A lead generation funnel can look like this:
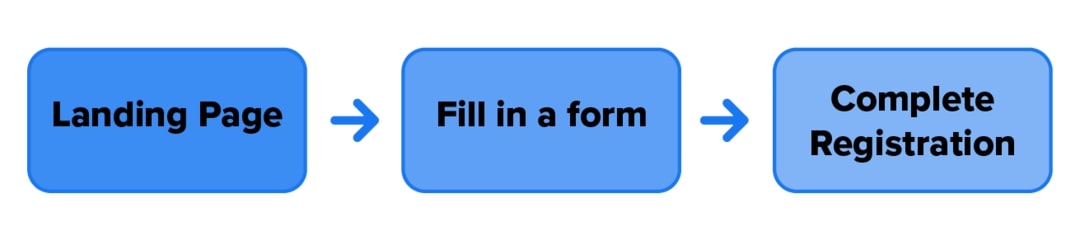
In this case, the main events you’d like to track are:
View Content: You’d like to register this event on page load on each one of your Landing Pages and on your Sign-Up Page.
Lead: You’d like this event to fire on page load if you have a “Thank You”/”Complete Sign-Up” Page, or on inline action when you don’t and the customer just clicks a Complete Sign-Up Button.
