How To Learn Graphic Design Without Going To School

 Learn graphic design online for free, without going to school or without a degree. If you would like to become a graphic designer, you can do so for free or by taking affordable and free courses. I taught myself graphic design and have helped many others learn to become designers through this article. Keep reading — you got this!

So you want to learn graphic design for beginners? You’re in the right spot! I’m going to teach you how I became a freelance graphic designer with zero experience and without holding a degree in graphic design.

First, let me say that this article isn’t meant to undervalue those who do go to design school. Designers who spend years working on their craft are obviously very knowledgeable and do amazing work.

But sometimes school isn’t in the budget for everyone and you might want to learn graphic design on your own.

Figuring out how to learn graphic design is the hardest part, which is why I’ve written up all the steps I took for you to follow.

Now, let’s dive right into how to become a graphic designer!

Steps to Learn Graphic Design

Before you go any further, I want you to commit to yourself that you’re going to follow through with these steps (if it’s something you truly want to do)!

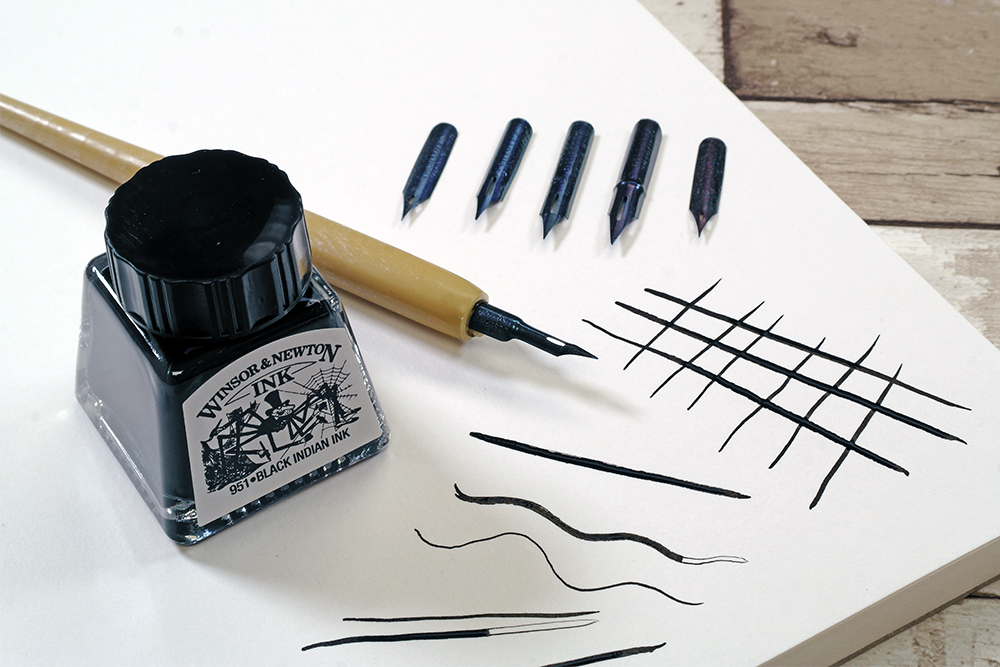
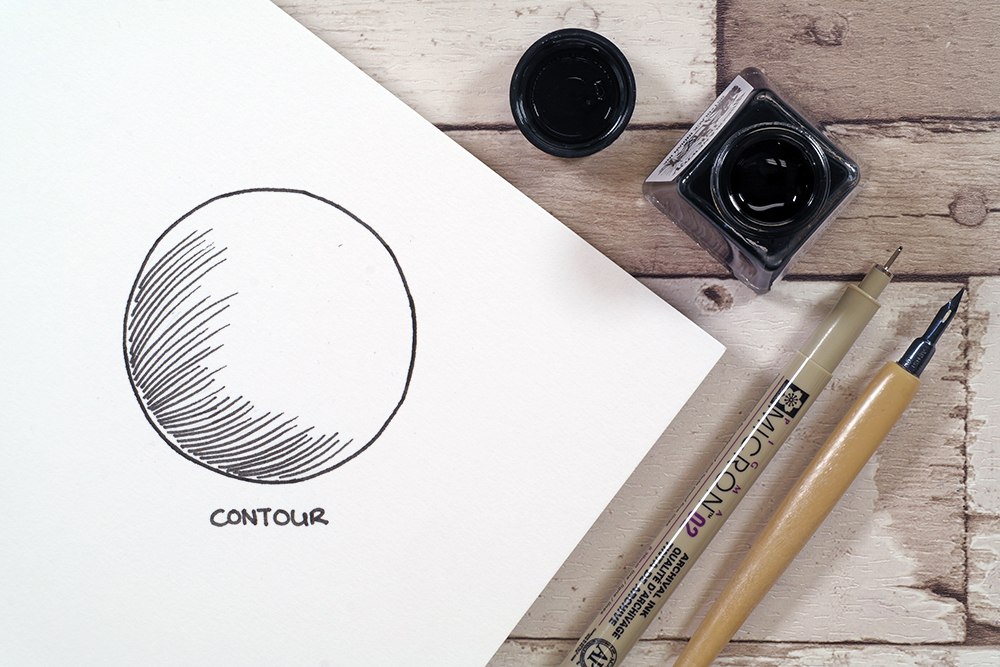
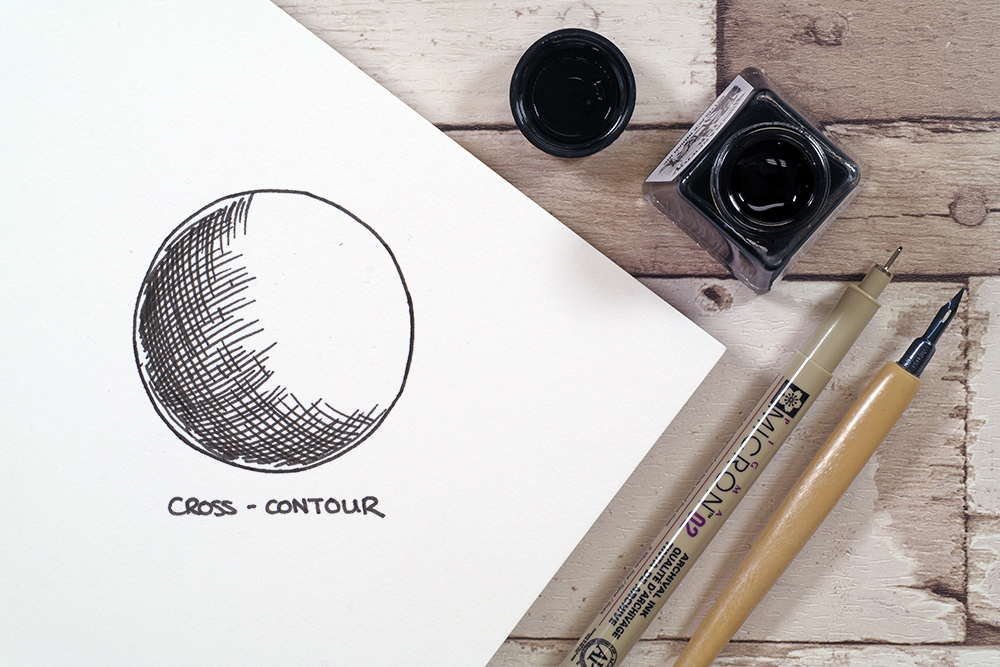
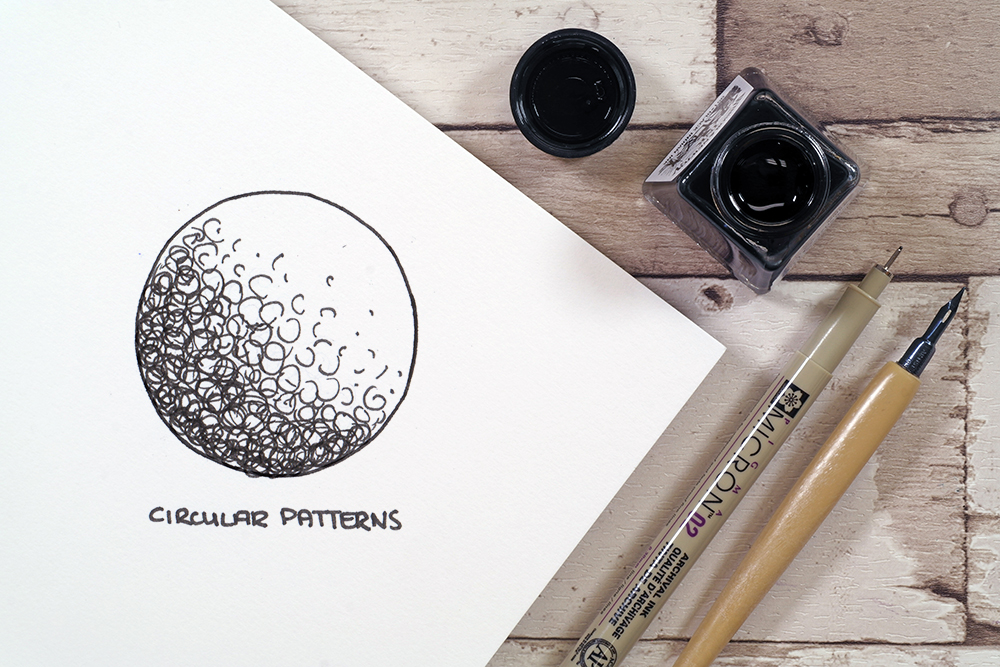
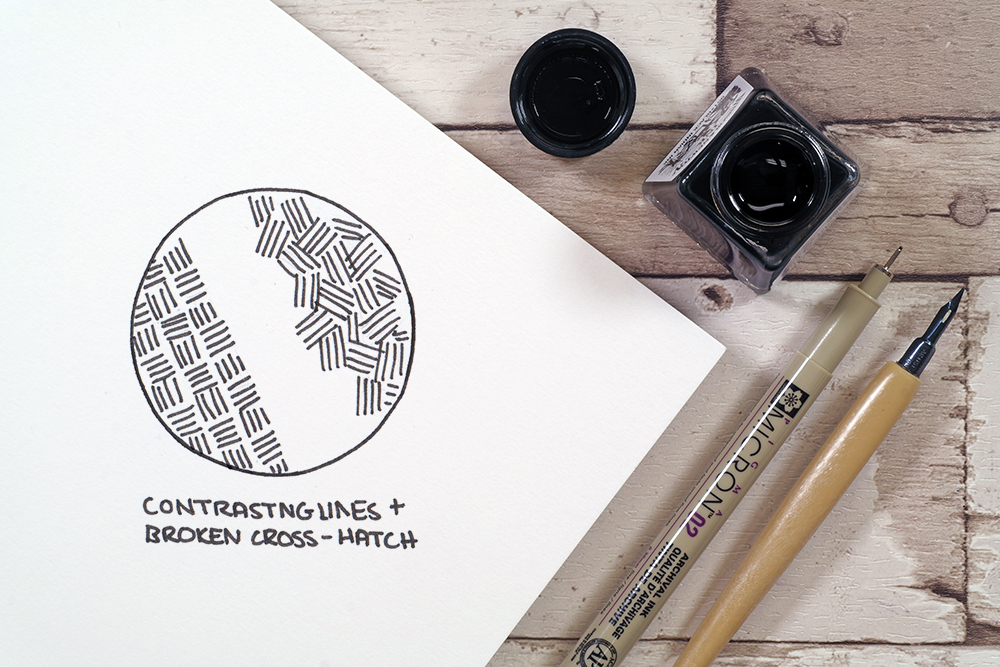
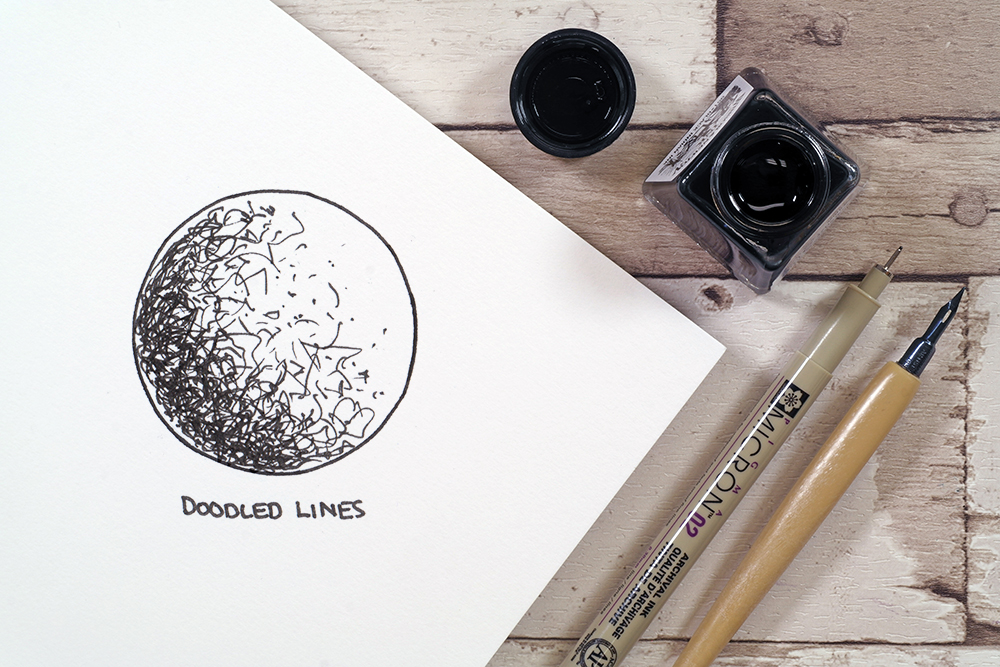
Step 1: Learn the Basics of Drawing

You don’t need to be a skilled drawer, but you will need to know some basics.

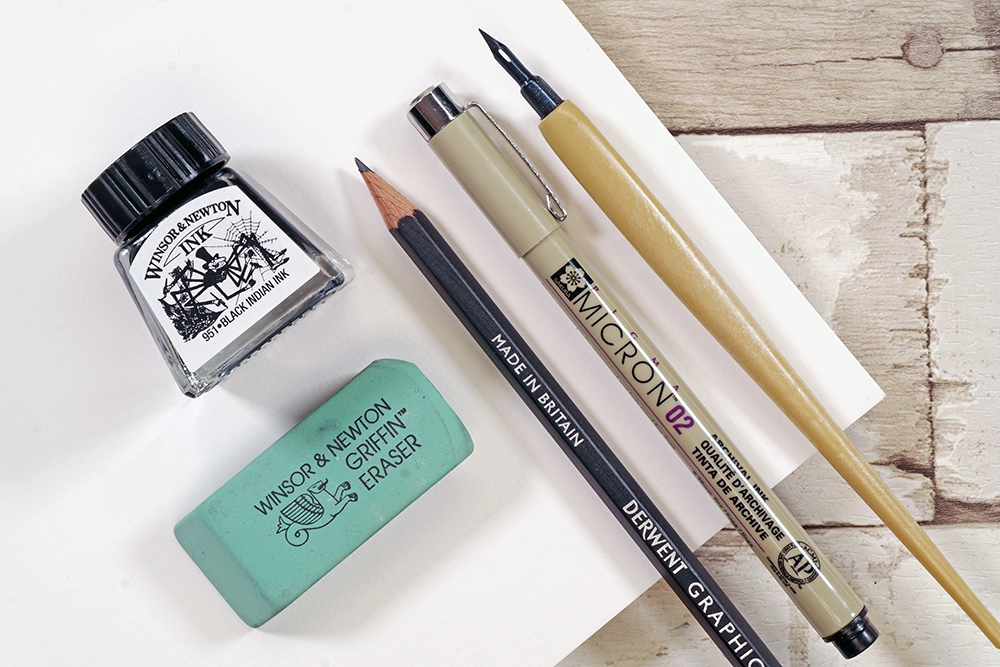
Before I began learning graphic design, I started with a good old pen and paper and went back to the basics.

I had to learn things like shadows and drawing 3D objects (something I wasn’t good at, but knew I would need to improve if I wanted to do logo design and mockups).

Step 2: Learn Graphic Design Theory

Your next step in learning graphic design is to learn some theory.

“But the theory is so boring.” I know, I know. Graphic design theory is rarely fun but I’m here to tell you how to become a graphic designer and the theory is super important.

If you want to become a graphic designer you’re going to need to learn some of the tedious material before jumping into the fun stuff.

Just because you are teaching yourself doesn’t mean you get to skip out on the boring material!

Knowing what types of fonts and colors go together and what doesn’t go together is going to help your designs immensely.

So teach yourself graphic design theory!

In regards to theory, I suggest starting off with learning the basics of color, typography, shape, space, lines, texture and size.

A great read to get you thinking of basic graphic design theory is the book Visual Grammar.

These books are some of my top picks for learning graphic design and design theory:

  • Design Elements: Color Fundamentals
  • The Language of Graphic Design

Step 3: Get Some Graphic Design Tools

As a bit of a digital nomad, my office moves around a lot so I like to keep it minimal when it comes to the tools I use. Luckily, graphic design doesn’t require lots of gadgets and gizmos (or oozits and whatzits #thelittlemermaid).

But the one thing you will need to become a graphic designer is graphic design software — this is non-negotiable 🙂

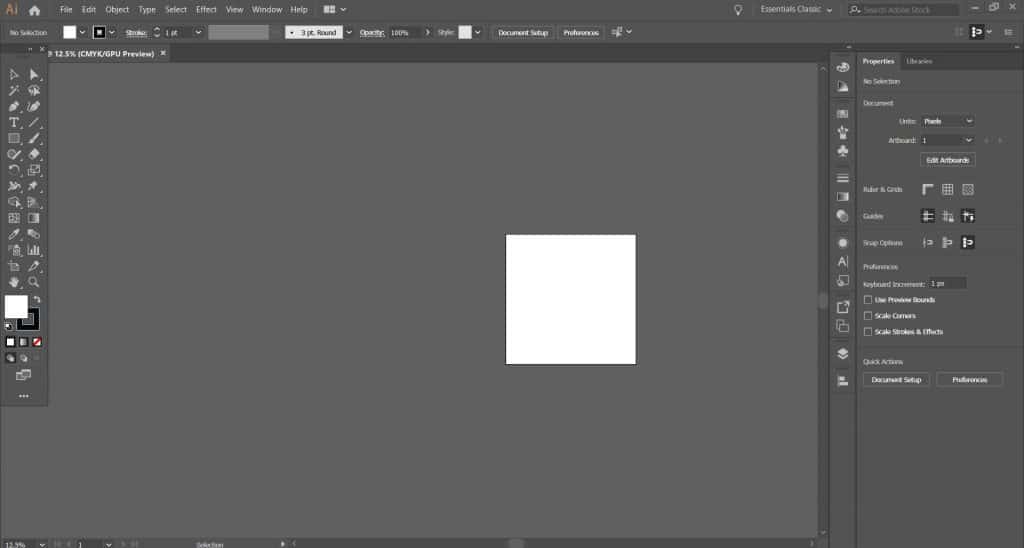
You can purchase Adobe Creative Cloud  which contains:

Illustrator: will be used for logos and other vector-based graphics

Photoshop: will be used to create special effects and edit media

InDesign: will be used to create materials for print or online such as brochures, PDF’s, books etc.

Plus many other programs that you can use as you grow!

Here’s where you may want to bookmark this article. Because when you are first learning how to become a graphic designer you aren’t going to need the below item, but after you’ve figured out the theory, how to draw and are comfortable in the above programs, you might find that you need some type of tablet.

Step 4: Learn the Tools of Graphic Design

Now that you have the tools and the know the foundation of graphic design, it’s time to actually learn the tools (yes! You finally made it to the step where you are going to actually learn how to become a graphic designer that can make designs)!

I’m thankful for all the affordable online courses out there because they will save you months of time trying to piece everything together on your own.

This Udemy graphic design course is much more affordable than an entire degree, yet it will still help you figure out how to use the tools and software.

A screenshot of Adobe Illustrator's interface

If you want to learn graphic design, you obviously need to learn the tools, and having video instruction will make that process so much easier.

I highly recommend signing up for the above course if you want to fast-track things a bit.

After you’ve learned the basics, you’ll be able to use the tools to create your own designs.

Graphic Design Tutorials

You can also use YouTube tutorials to teach you everything if a course isn’t in the budget. YouTube is great because you can learn by doing, seeing and hearing.

Here are some of my favorite YouTube channels for free graphic design tutorials:

Spoon Graphics: My favorite tutorial was the Tattoo Inspired Vector Illustration in Adobe Illustrator. Prior to buying a tablet, I searched high and low for some quick way to create stipple shading. So bookmark this tutorial for when you are ready to stipple shade.

Design Tuts: There are some more advanced sports logo tutorials on this channel but it’s really helpful to see the process and how more advanced designs get formed.

Will Patteson: His channel is full of great information. Everything from tutorials to Q&A’s about freelancing. This is my go-to channel and helped me so much as a beginner.

Helen Bradley: This channel is my favorite for beginners. I came across Helen Bradley while searching how to make wreaths. Her tutorials are excellent for beginners.

PHLEARN: This channel is strictly Photoshop. Verbal instructions make the tutorials easy to follow. Some other channels (not PHLEARN) have tutorials that don’t have verbal instruction and only have music playing, which can be frustrating for a beginner.

Tasty Tuts: If you don’t want to read about graphic design theory, this channel offers video versions for you. I also learned InDesign by going through 15 InDesign lessons offered on this channel. Here is lesson one; the video description contains the other lessons.

Skill Share: Videos on a range of creative topics.

Matt Borchert:  This video on Matt’s channel discusses designer ethics and is a must-watch.

Graphic Tweakz: Logo tutorials galore!

Satori Graphics: Tons of tutorials.

These channels offer many different tutorials, but feel free to do your own searches to find what you are looking for and go through at least one every day.

Step 5: Build Up Your Graphic Design Portfolio

A lot of people are scared to venture out into doing real work.

“What if they ask for my credentials or my degree?!” Maybe you’re scared of this to? Let me tell you something — I’ve never been asked once in my career for my credentials.

I have, however, been asked to see past work or a portfolio, and when my prospects see my portfolio, they almost always book immediately.

So, where else can you find small projects to help develop your portfolio if you want to become a graphic designer?

Easy Pen and Ink Techniques for Beginners

 Pen and ink is an ancient drawing medium that has been popular with artists for centuries. Nowadays, we have access to all kinds of wonderful pens that artists of days gone by could only dream of! From fine liners and dip pens, to markers and brush pens – there are so many of these drawing tools to choose from. Each offer their own unique properties for pen and ink drawing.

Two Thatched Cottages with Figures at a Window (c. 1640) by Rembrandt van Rijn

Pen and ink can seem like a big step from pencil drawing – especially for beginners! You can’t erase pen, unlike pencil, so your mark making must be carefully calculated. There’s nothing worse than creating the perfect drawing only for it to be ruined by one misplaced line! With pencil you are able to adjust your shading by varying the amount of pressure while drawing. This isn’t the case with pens! You’ll need to rely on carefully placed lines and marks to give the impression of shading. Tightly compacted linework will give the impression of deep shadows, while spaced out linework will create an area filled with light. Juxtaposing both these tight and loose marks will create a drawing with great contrast and texture.

Below easy pen and ink techniques for beginners below offer a great starting point, if you are looking to grow in confidence with your pen and ink technique.

What You’ll Need to Get Started

If you’re just starting out with ink drawing there are only a few bits of equipment you will need. Compared to painting, this discipline has a fairly low cost entry level, so is great for artists who are just beginning their creative journey or who are looking to level up their drawing skills. To begin you will need the following:

Winsor & Newton drawing ink, eraser, pencil, pen and dip pen on a pad of cartridge paper
  • A selection of drawing pens.
  • dip pen, nibs and appropriate ink if you prefer working with a dip pen.
  • Some Cartridge Paper.
  • Graphite Pencil & eraser if you would prefer to sketch before you ink.

Once you have these materials you will be ready to go! Typically the materials you will need for pen and ink are easily transportable, so if you’re taking classes or working on the go creating art couldn’t be easier!

What are the Differences Between the Types of Pen Available?

There are so many different types of artists’ pens available, it can be difficult to settle on the right one for you. Especially if you’re a beginner! We’ll take a look at a few of the variations of pens we stock and explain the varying qualities they bring to pen and ink drawing.

Fine liners & Technical Pens

Selection of artists' fine liner pens  with watercolour wash.

Fineliners Paper have a plastic or fiber based nib held in a metal casing. They have very fine nibs, typically ranging from the smallest 0.03mm size up to 0.8mm, depending on the brand. The nibs all have a fixed width, so the line you get will be very uniform, consistent and skip-free. Most of pens are pigment based and waterproof – so your drawings will be lightfast and can be worked over with water color or ink later. All of our fine liners are available in black, with select ranges available in other colors. Fine liners are the easiest pens to draw with if you’re a beginner.

Brush Pens

A selection of artists brush pens with  swatches of each pen.

Brush Pens offer more variation in line width than a fine liner pen. Their nibs have a wide base that then tapers to a fine point. Typically the nib is made of a conical piece of felt, but there are pens that have a true brush tip made of individual fibers like a paint brush. You can vary the weight of your line by adjusting the amount of pressure you draw with. Light pressure will result in a fine line, whilst pressing down harder will create a thicker line. They are fantastic if you want more diversity in line weight and style in your drawing. Or are looking for a more versatile pen to experiment with. Some brush pens are water-soluble, so you’ll need to double check this if you want ink that is permanent.

Dip Pens

Winsor & Newton Drawing Ink and Dip Pen on a pad of cartridge paper

Dip pens are not cartridge fed like fine liners and brush pens. Instead, you dip them into a bottle of ink and re-dip once the ink runs out. This technique is more akin to the types of pen and ink drawing done by artists of the past. One benefit of dip pen drawing is that the colors available are virtually unlimited. Most bottled inks are suitable for use with a dip pen, so there will be plenty of colors to choose from! You also have the choice of working with either water-soluble or waterproof inks, depending on your preference.

Dip Pens don’t give a uniform line. As you apply pressure the flexible tip of the nib will move, allowing more ink to flow from the tip. They also have a tendency to splatter ink if the nib catches on your paper. For some people this splattering can be an annoyance, but for many it is part of the charm of drawing with a dip pen. Nibs for dip pens are also interchangeable, so you’ll be able to swap them out if you fancy a change.


You can use other specialty pens, like calligraphy pens, for line drawing. These types of pens have specially designed nibs usually used for hand lettering techniques. You can use them to achieve precise marks and textures for drawing. They do require a bit of experimentation before you get the hang of using them.

Technique 1: Hatching

Hatching technique with Sakura micron fine liner pen

Hatching is the easiest and one of the most basic ink drawing techniques. To hatch you essentially create a series of horizontal parallel lines. You can use a ruler to get sharp straight lines for an architectural look but freehand lines will give your drawings more character. The closer together you draw your lines, the more dense the shading effect they will create. The further apart they are the lighter the shading will appear. This technique is best for shading areas with medium shadow.

Technique 2: Cross-Hatching

Cross-hatching technique with Sakura micron fine liner pen

Cross-Hatching builds on the Hatching technique. Essentially you’ll need to start by creating the same hatched lines as before. Once you’re done you’ll create another layer of hatched lines that overlap your existing linework. This second layer is commonly done at a 90 degree angle, but you can add them in as many layers and angles as you choose. The more layers you add at different angles the more dense your shading will become. Use Cross-Hatching for creating areas of deep shadows while creating texture.

Technique 3: Contour

Contour technique with Sakura micron fine liner pen

Contour shading works similarly to Hatching, but your lines will follow the curves of the object you are drawing. If you are drawing a curved object then using contoured lines over simple hatching will give more illusion of shape. Hatching can leave your drawings looking a little flat. As with hatching, the closer together the lines, the deeper the shadow effect. Don’t worry about your lines being perfect – little imperfections will give your drawing character.

Technique 4: Cross-Contour

Cross-contour technique with Sakura micron fine liner pen

Cross-Contour works along the same principle as Cross-Hatching, only you will start with contoured lined rather than hatched lines. Again, you can add in as many layers and directions as you want to build up the shadow density you need.

Technique 5: Stippling

Stippling technique with Sakura micron fine liner pen

Stippling is one of the more time consuming pen and ink techniques. It relies on carefully placed dots to give the impression of shadow and depth. The more densely concentrated your dots, the deeper the shadow will be. Create each dot by pressing the nib of your pen against the paper – you aren’t really ‘drawing’ and filling each individual circle. The smaller the nib size of your pen, the smaller your stippled dots will be. In areas that have very little shading you will only need to place a few strategic dots here and there. It can take a long time to build up your shading, especially if you re working on a large piece. Consider the size of the nib you use and don’t lose your cool! This technique gives ultimate control over the contrast between light and dark in your work.

Technique 6: Circular Patterns

Circular Patterns technique with Sakura micron fine liner pen

Use Circular Patterns to create areas of both light and dark shadow. The larger, looser and less tightly packed your circles the lighter your shading will be. As your circles become smaller and more dense your shading will appear much darker. This technique is great for quickly capturing natural textures in a uniform way – try using it to give the impression of foliage or scales.

Technique 7: Contrasting Lines & Broken Cross-Hatch

Contrasting lines and broken cross-hatch technique with Sakura micron fine liner pen

Contrasting lines and Broken Cross Hatch are two similar techniques that work the same way as a regular cross hatch. Contrasting lines (sometimes called ‘weaving’) is used to create a pattern where small groups of hatched lines are drawn at angles to each other. These lines can be made in a uniform arrangement, or placed in a more random manner depending on the texture you want to create. You can overlap these lines to create an unbroken pattern.

Broken Cross-Hatch is similar but works with groups of intersecting cross-hatched lines. The more your lines intersect the darker the shading will be. Both these techniques generate an aesthetically pleasing texture.

Technique 8: Continuous & Random Doodled Lines

Continuous and randone doodled lines technique with Sakura micron fine liner pen

Continuous and doodled lines are usually made up of one unbroken or a few very long weaving and overlapping lines. These lines shouldn’t be made in any sort of predictable pattern. Rather, you should relax your hand and just begin to create instinctive marks. It can take a little bit of practice to let go and relax, while also bearing in mind not to go overboard. Once you’ve practiced a little you’ll soon be able to create shading that’s perfect for giving the impression of textures like leaves, bark and more!

Technique 9: Pressure Lines & Thickness

Pressure lines and thickness technique with Sakura micron fine liner pen

This technique makes use of the different sizes and styles of nibs available. If you are working with fine liner pens there will be lots of different nib thicknesses available to you. Using a combination of these thicknesses in your drawings will make it easier to create varying degrees of shading. Try mixing up the sizes of pens you use to see how different sizes affect the types of linework you can create.

With Brush pens you’ll find that the more pressure you put on the pen, the thicker your linework will be. This allows you to create a single line with a varying line weight – something that you can use to your advantage in your drawings. The thickest lines can be used to create dramatic shadows, while the variation in line weight will give your drawing more character.

Other Hints & Tips

  • If you’re just starting out begin by practicing these techniques on simple geometric shapes. Start out with a cube and work out how light and shadow will affect each of its faces. Try and translate this contrast in dark and light into a drawing using the techniques above.
  • As you grow in confidence start trying to render more complex objects. It can be useful to draw these objects from life to see how light and shadow appear in a real life setting. Try capturing mugs, glasses and other household items.
  • If you’re nervous about putting pen to paper try planning your drawing with Pencil first. This planning will help you work out where your lines need to be placed, without worrying too much about making mistakes.
  • Try pens with specialist nibs, like the Pilot Parallel Pen for some interesting mark making techniques.
  • Try mixing up different techniques to help define the form of the object you are sketching. Cross hatching and contour are commonly used together.
  • Use a mixture of different pens in the same drawing.
  • Change the way you hold your pen. Holding your pen at the bottom will allow for more free, expressive lines, whereas holding it close to the nib will allow you to work in more detail.
  • Add water to water-soluble linework to add character and interest to your drawing.
  • Use dry pens for texture. Using a dry marker, felt tip or brush pen can add texture to your work as they create a broken stroke of ink.
  • Use colored pens to add a bit of vibrancy to your drawings.

Some Useful Tips to Keep a Well-Organized Art Studio

 Do you struggle with keeping your art studio as clean and organized as you’d like? Do you wonder how so many artists/creatives manage to keep their working spaces so neat and tidy? Have you ever found the mess around you demotivating to the point that it affects your productivity levels?

Though the act of creating art can (and sometimes downright should) imply making some sort of mess, this doesn’t mean we should be okay with our studios being in a constant state of chaos.

​Of course, people’s tolerance levels towards disorganization vary immensely, but our studios are an extension of ourselves and our work, and should be treated as such. 

Personally, I like to work in an environment that inspires me to create and helps me be as productive as possible every-single-day. My artwork is important to me (and I hope that your artwork is important to you as well), and staying as organized as possible ensures that it is going to be protected and accessible. 

 Ways to get (and stay) organized

​​                                                

This is true for the people you surround yourself with, as well as the sorts of art and entertainment you consume. But it is especially valid in your own art studio, the very place you want to be free to act on your creativity to produce wonderful creations.

If your space is cluttered and disorganized, your mind will spend precious resources distracted by the mess. It will take you extra time to find materials to get started on a new project. Your aim should be to lower the activation energy needed to create art.

​Spend some effort on organizing your space, so it’s easy for you to dive in when inspiration strikes!

I’ll go through some general tips on how to get your art studio in working order, and give you specific ideas on how to implement each of them.

​Let’s get into the tips!

1. Purge your supplies 

The first step in organizing your art space should actually be getting rid of all the stuff you don’t need or won’t ever use. You probably know if you have some hoarding tendencies, in which case you’ll have to spend some extra effort to actually acknowledge that you don’t need all those Styrofoam spheres.

But don’t just toss any good markers and paints that aren’t getting use! Donate them! There are so many places that are happy to receive donated arts and crafts supplies: elementary and preschools, YMCAs, community centers, women’s shelters, churches, art centers, etc.

It’s best to donate locally.

So just do a quick Google search, “where to donate art supplies ” to find locations nearby.

Make sure that the supplies you donate can actually be used! Dried up paint and crusty paint brushes aren’t useful for anyone. So when you are purging your art supplies, you’ll need at least two piles: one for trash and one to donate.

2. Use containers for writing, drawing, and painting instruments

There’s no need to spend loads of cash on fancy decorative bins.

You can use tin cans and mason jars to store pens, pencils, markers, and paintbrushes (and decorate them yourself if you want). 

You can also find all sorts of neat containers at dollar stores and thrift shops. These sorts of open containers make sure your tools are always visible and easily accessible.

Make sure to have enough containers that you can actually sort all your creative instruments with plenty of space. This way you don’t have to work to cram pens into overstuffed mugs or spend time trying to find just the right marker.

3. Have a designated place to store your works in progress

Some people are only working on one project at a time. Others have six or twelve different things that are waiting to be completed.

​Regardless, you should always be able to clear off your work surface, and also protect your work from accidental damage, which means you need to have a place to put your WIP.

This is easiest for 2D art. If you have any adjustable shelving, make a short shelf or two, just a couple inches high, that are always kept clear so you can place your work there. There are also flat plastic ArtBins that are useful for keeping dust, lint, and hair off your work.

For 3D projects, a container on a larger shelf will work. I actually like to use the top bucket-shelf of the rolling Ikea trolley. (It’s called Raskog if you want to check it out.) For larger pieces, I’ll usually place projects up high on top of shelves so my kids don’t wander past and touch something delicate that needs a day or two to set.

4. Take advantage of vertical storage

​I know a lot of us are cramped for space. Maybe you only have a corner, instead of an entire room to use for creative purposes. In that case, vertical storage will absolutely be your new best friend. Use all the height you can!

Install shelves, cubbies, or racks that go all the way up to the ceiling. (But make sure to have a sturdy step stool so you can actually reach things at the top.)

​They are super useful for hanging tools and buckets, but you’ll need the right accessories: straight and curved pegboard hooks. You can also get pegboard kit, with a great variety of hanging devices.

​It’s all super affordable and available at any big hardware store.

​5. Use bins and boxes for larger items

Okay, so you have shelves, cubbies, or racks and finally have all these spaces to put your supplies away.

Don’t just make sloppy piles of materials! Those shelves will quickly become a black hole of lost utility.

Create separate containers for different sorts of materials and tools. Or group together all the supplies for a type of project, so your watercolor paints, brushes, and paper are all in a single box for easy use.

Plastic shoe boxes are an affordable option, and they only cost a couple bucks each.

​6. Hang your storage

Yes, I love to hang things! It’s incredibly flexible storage you can rearrange as you see fit, which is great if you’re like me and maybe switch to a different art mode every few months.

So past pegboards, which I mentioned above, another of my favorites is using towel rods or curtain rods. You can find affordable ones at online, or pick some up at a hardware store. I use S-hooks to hang buckets with supplies.

You can also hang string or wire across a wall, and use clothespins to display some of your work! It’s easy to rotate out what you are looking at, as the mood strikes.

Another option for hanging storage would be over-the-door storage. No shame in repurposing a hanging shoe rack to hold things like cans of spray paint or skeins of yarn.

Smaller over-the-door organizers are great for pens, markers, glues, and paint as well.

7. Label your containers

This one is big and was a total game-changer for me.

Before I started meticulously labeling my containers, my organization system would quickly decay the first time I was in a hurry to put everything away and just shoved supplies into whatever bin looked like it had enough space. “I can always reorganize it again later,” I thought.

Which I would have to do. Over and over again.

By labeling all your storage containers, you not only know where to find everything, you can also easily tell where to put everything away. Miraculously, all my pens and papers and ribbons and tapes now actually stay separated and useful.

And hey, labels can also be super fun to make! So take some time and make a pretty project out of it.

​8. Once it’s clean, keep it clean

Once you have a system in place for storing all the art supplies and projects you have decided you want to keep, you need to put in a little effort to maintain it.

At the end of the day, or when you are finished working on a project, spend a few minutes to put everything back in its proper spot. Clear off your work surface and put all your pencils or paints back in their spots.

This is time well-spent, and will absolutely save time for your future self (hey future self, have some time!).

Tomorrow, when you sit down to create something, you’ll have space to work and will be able to easily find all the things you want to you.

Best of all, you’ll be more likely to actually make more things, because your creative space will be so much easier to use.

“For every minute spent organizing, an hour is earned.”