Creating a flat lay photo is one of the easiest ways to take your Instagram posts from “nice” to “Are you a production designer? This looks like it was in Vogue.” Whether you want to create some sweet Facebook ads for your small business or up your personal branding game, we’ll take you through all the steps to creating the perfect flat lay photo.
What is flat lay photography?
Flat lay photos are images shot directly from above. Think bird’s eye view, with said view consisting of a beautiful arrangement of objects. Great flat lay photography tells a story through its objects, colors, and organization. It’s become immensely popular over the past few years, showing up frequently on social media. Personal brands use flat lays, company brands use flat lays…
…errrybody uses flat lays. Now let’s walk through some flat lay photography ideas to learn how to use ’em yourself.
1. Get inspired by flat lay photos
If you’re not sure where to get started, or what direction you wanna take, we suggest browsing Pinterest or Instagram with the #flatlay to get an idea of what looks you like. Or browse our Pinterest pins and other templates for inspo.
2. Assemble your props like a pro
Just like props exist in theatre to amplify the scene, props are used in flat lay photography to amp up the pic. Follow these intuitive tips to assemble your best-laid photo (pun intended).
Appropriate theme
Consider the focus of your flat lay photo. If it’s business-driven, maybe you have a beauty blog and the answer is super straightforward (cosmetics!), or maybe you’re going for something a little less concrete (like trying to capture the feeling of excitement before an impending journey). Whatever it might be, establish a theme and keep it in mind while selecting your props so you end up with a cohesive look.
Prop type
Let’s talk prop type. Props can be neutral or universal objects like plants, books, paperweights, or everyday knickknacks you’d find around the house that photograph well. You don’t want to detract attention from the main subject – only to have complementary objects that will enhance the photo.
If you’re in the health and wellness field, consider stones and crystals, or yoga-focused objects. Décor with motivational quotes is always a good idea, too. Consider what energy or vibe different objects give off as you begin to assemble them. And put yourself in your ideal audience’s shoes – how does this flat lay make you feel to observe it from the opposite perspective?
Prop volume
Don’t be shy – pick a lot of props (more than you would conceivably use) so that you can swap things in and out while you compose your shot. As you begin to shoot, you don’t want to have to go back to your in-home shopping spree. The small adjustments you make can be intuitive and result in the perfect, marketable flat lay photo.
Prop color
As you peruse your home for props, it helps to have a color palette in mind. Different colors prompt different moods and feelings in an audience, so consider color theory as you prep. How does your variety of props make you feel as they lay together? How would you like to feel? Let these decisions inform your focus.
Diverse shapes and sizes
Lastly, go for objects of varying shapes and sizes in order to prompt visual interest. What just looks good together? Trust your gut. Maybe too many bulky objects clash. Maybe alternating objects as big, small, big, small, looks too staged. Create balance in your photo by mixing smaller objects with larger objects in a subtle way and placing objects of similar colors on both sides of the image.
This is a great time to consider diversifying textures as well — whether that pertains to your background or the objects themselves. Soft, rough, hard, smooth. Just like we desire foods to have a balance of salt, sour, bitter, and sweet, the same is true here. Balance is key. As you keep finding inspiration at home and on social, you’ll get clear about what exactly feels right.
Be fluid, be creative, be flexible!
3. Grab an extra pair of hands to assemble the flat lay
Some of our favorite flat lay photos look more “candid” because they include people (or, more accurately, body parts). If you want to create a look that has a sense of movement and action, consider enlisting the help of a friend. It’ll be way easier/less impossible than trying to pose and photograph yourself.
4. Pick a flat lay friendly background
When choosing a background, it’s best to keep things simple. A plain white background works well because it won’t distract from your props, but you can also pick something neutral like a wood floor or table. If you want to use a colored background, you can get crafty by taping some matte wrapping paper on a floor or table.
Or, if you’ll be doing flat lays consistently, consider investing in some vinyl backdrops to easily create a rustic look. You can also magically erase any background you have after the photo shoot and put in a new one with our automatic background remover tool.
5. Stage your flat lay photo
Now that you have all your props and your background, it’s time to get organized. Set up next to a window and try to shoot in the morning or late afternoon when you’ll get the best light. Try not to use a flash, as this will create shadows.
When setting up your shot, leave a little bit of space between each object. This will help highlight each prop and keep your shot from looking cluttered.
If you plan on posting your photo to Instagram, a square layout looks really nice. If you’re shooting with your phone, it’s easy to set up a shot by picking the square setting in your camera.
6. Leave space for text and graphics
You might want to leave some space where you can add text or graphics in post-production. If you’re creating an ad, this is where you can add your brand name and logo. Or if you’re going for a more inspirational look, you can stick in a quote.
7. Shoot from above
Climb up on a ladder or step stool and get to shooting. Creating distance between you and the flat lay will help you fit everything into the shot. This is also one of the only ways to ensure that your photo actually looks flat.
Once you’re up there, take a few test shots and don’t be afraid to keep moving props around until it looks just right. When you have your perfect shot, it’s time to edit!
8. Work some basic editing magic
Start your flat lay design quickly with one of our designer-made templates.
You might have a great photo (we knew you could do it), but a few simple edits to your image’s colors, exposure, and clarity can seriously up the wow factor.
9. Add text and graphics
If you left space in your image for text and graphics, now’s the time to add them in.
10. Post it and bask in the glory of your social media savvy
You probably didn’t spend all this time on your flat lay photo just to let it sit. Time to share with the world!
Let’s talk tips for flat lay photography. The number one piece of equipment that I recommend that you get to improve your flat lay photography is a tripod or a c-stand. But, how do you know whether you should choose a c-stand vs. a tripod…or both, and why are they even important in the first place?
I’ll break it all down for you in this post and tell you why I prefer a c-stand over a tripod for flat lay photography. But, let’s start with a little story…
WHERE I WENT WRONG WITH MY FIRST TRIPOD
I first bought a tripod about a year ago when I began my photography journey. In my excitement, I bought ALL the things. You know, every single piece of gear that I thought made me appear to be a “real” photographer. Tripod? Check. Everything you could possibly think of. Never mind I didn’t know how to use all of the things that I purchased, nor why I even needed them in the first place.
In my rush to look the part, I made a number of rookie mistakes:
Neglected to carefully think through my selections.
Didn’t factor in quality.
Failed to consider the features.
Also, I didn’t even think through how I, personally, planned to use the piece of gear or tool I was purchasing.
With the various models available, these are crucial considerations to make sure the model you choose fits your current needs and any potential future needs you might have.
Putting price of equipment above everything else (e.g., features, quality, current and future needs) was my rookie mistake.
Let’s take my first tripod, for example. I bought an inexpensive tripod that was around. (I considered it expensive at the time.) It included both the legs and a head that was attached to the tripod. My first professional use for that tripod was an interiors shoot. By that time, I had upgraded my camera to one that was heavier in weight.
When I got to the shoot, the head would not support the weight of that camera, so it wouldn’t stay in place. It kept tilting…which is NOT ideal for interior photography where you need the verticals (e.g., walls) to be straight. I had a lot of editing to do after the shoot. Needless to say, I only used it once. Talk about a waste of money!
My first tripod definitely wouldn’t have cut it for flat lay photography. Had I known from the start that I was going to shoot flat lays, and anticipated that I would upgrade my camera and lenses to better quality ones, I could have saved up to buy the best tripod for my purposes. My goal with this post is to help you not make the same mistakes and to guide you with tips for flat lay photography in order to make the best decision for your needs when it comes to choosing a c-stand or tripod (or potentially both) for flat lay photography. But, first things first.
TIPS FOR FLAT LAY PHOTOGRAPHY: MY TOP 5 REASONS YOU NEED A C-STAND OR A TRIPOD!
If your goal is to shoot flat lays regularly, then having a c-stand or tripod really is a must, and here is why:
Ensures (along with a camera level) that your camera is directly overhead.
Allows your camera to maintain a consistent vantage point as you tweak your styling.
Eliminates camera shake (i.e., unintentionally blurry images) that is caused by shooting hand-held, especially when the shutter speed is slow.
Keeps your hands free to slide your hands in the shot.
Saves you from back pain from hunching over your scene while capturing the image.
TRIPOD VS. C-STAND: WHAT’S THE DIFFERENCE?
The main difference between a tripod and a c-stand relates to their primary and intended purposes.
Most people are familiar with a tripod. It is a piece of photography equipment that is designed to stabilize your camera and is used in various genres of photography, from landscapes to portraits to products and food.
On the other hand, a c-stand’s primary purpose is to hold or grip lights, scrims, reflectors and other accessories at various angles and distances to the set without getting in the way like a traditional light stand might. A c-stand also eliminates the need to have someone hold the reflector, for example, for you. Over time, photographers also began using c-stands to mount cameras for overhead shots or flat lays.
A secondary difference is the way that the two are constructed. With a tripod, you extend the legs to get more height and widen them to get a more stable base. With a c-stand, the legs remain in place and low to the ground, and you adjust the body to get more height without compromising the stability.
WHY I SWITCHED TO A C-STAND FOR MY FLAT LAY STUDIO WORK
Reduction of Maximum Height
For a long time, I used this tripod for my flat lay photography. I love that it has a center column that I can position horizontally for overhead shots. Also, it is relatively lightweight and collapses to a small size, which is perfect for travel. At 6ft maximum height, I thought that it would be perfect for all of my needs. What I didn’t anticipate was that the height would be reduced to 4ft 8in if I used the center column horizontally and even more so (to 3ft 8in) if I widened the legs. This was fine for tighter shots but more problematic for wide ones.
You might ask, “Why widen the legs?” With a tripod, the legs go on the side of your setup. For some larger backdrops, you need to widen the legs so that the tripod doesn’t sit on top of your backdrop and cause potential damage. Also, widening the legs gives the tripod a more stable base so that it doesn’t tip as easily.
The tripod legs got in the way
With the legs narrowed, I sometimes encountered a situation where the legs got in the shot, depending on the lens I was using. While I could compensate for this by switching to a longer lens, I like to make my lens choices based on the composition and image I have envisioned vs. logistical concerns. At other times, the legs would cast a shadow on my scene. If the legs were too close together, I found that I couldn’t position fill cards (e.g., white or black foam core) the way I wanted to bounce more light into the scene or block light from entering the scene.
For these reasons, I knew that I needed a different tripod option. However, my tripod already worked well for me in many ways. For example, it is perfect for 45 degree or straight-on shots as well as for interiors. It even works well for some flat lay images, especially if I am shooting a minimalist image with a long lens on a standard size (e.g., 18”x24”) backdrop. It is also highly portable and easy to take along with me when I deliver flat lay workshops at conferences. So, getting another tripod would only give me increased height and no other advantages.
IMPORTANT TIP FOR FLAT LAY PHOTOGRAPHY: ADVANTAGES OF A C-STAND OVER A TRIPOD
That’s where the c-stand comes in. In addition to the height advantage, a c-stand has the added versatility that I mentioned above in terms of holding lights and accessories. Plus, it has some additional advantages specifically for my flat lay photography. The primary reasons I prefer a c-stand include the ability to:
Get much higher above the scene:
This was important for shooting wider scenes as well as for using certain lenses (e.g., 85mm) that have a minimum focusing distance that was not conducive to the height of my tripod. If your camera is too close to your subject, the camera will not be able to lock focus, unless you use a macro lens.
The minimum height of my c-stand is approximately the same as the maximum height of my tripod. The maximum height of my c-stand is about 11ft, so I am now only limited by the height of my ceiling. Although the c-stand can extend far above my height, I don’t have to worry about reaching my camera because I shoot tethered to my laptop and control the settings from there.
Set up two scenes simultaneously:
I am able to style one scene on the floor and another on a table. This works great when I have both a product shoot and a food shoot on my agenda. When I am ready to shoot the second scene, I just swivel the boom arm to the next surface area.
Leave my gear set up between shoots:
I don’t know about you, but having to break down and set up my gear every time I want to shoot is a bit annoying. I’d rather use those precious few minutes to begin styling my scene. No more tripping over my tripod legs or breaking the tripod down each time.
I keep my c-stand setup and just swivel the arm parallel to the wall or release the boom arm to rest vertically when I’m not using it. That way, I don’t bump my head on it and can walk freely around my office studio.
Slide large reflectors in on all sides for a bright and evenly lit photo:
Because of the triangular formation of the tripod legs and the length of my centre column, I was not able to position large pieces of foam core appropriately.
Position myself to get my hands anywhere in the frame:
See reference image below. Without having to maneuver around the legs. I know longer have to practice being a contortionist.
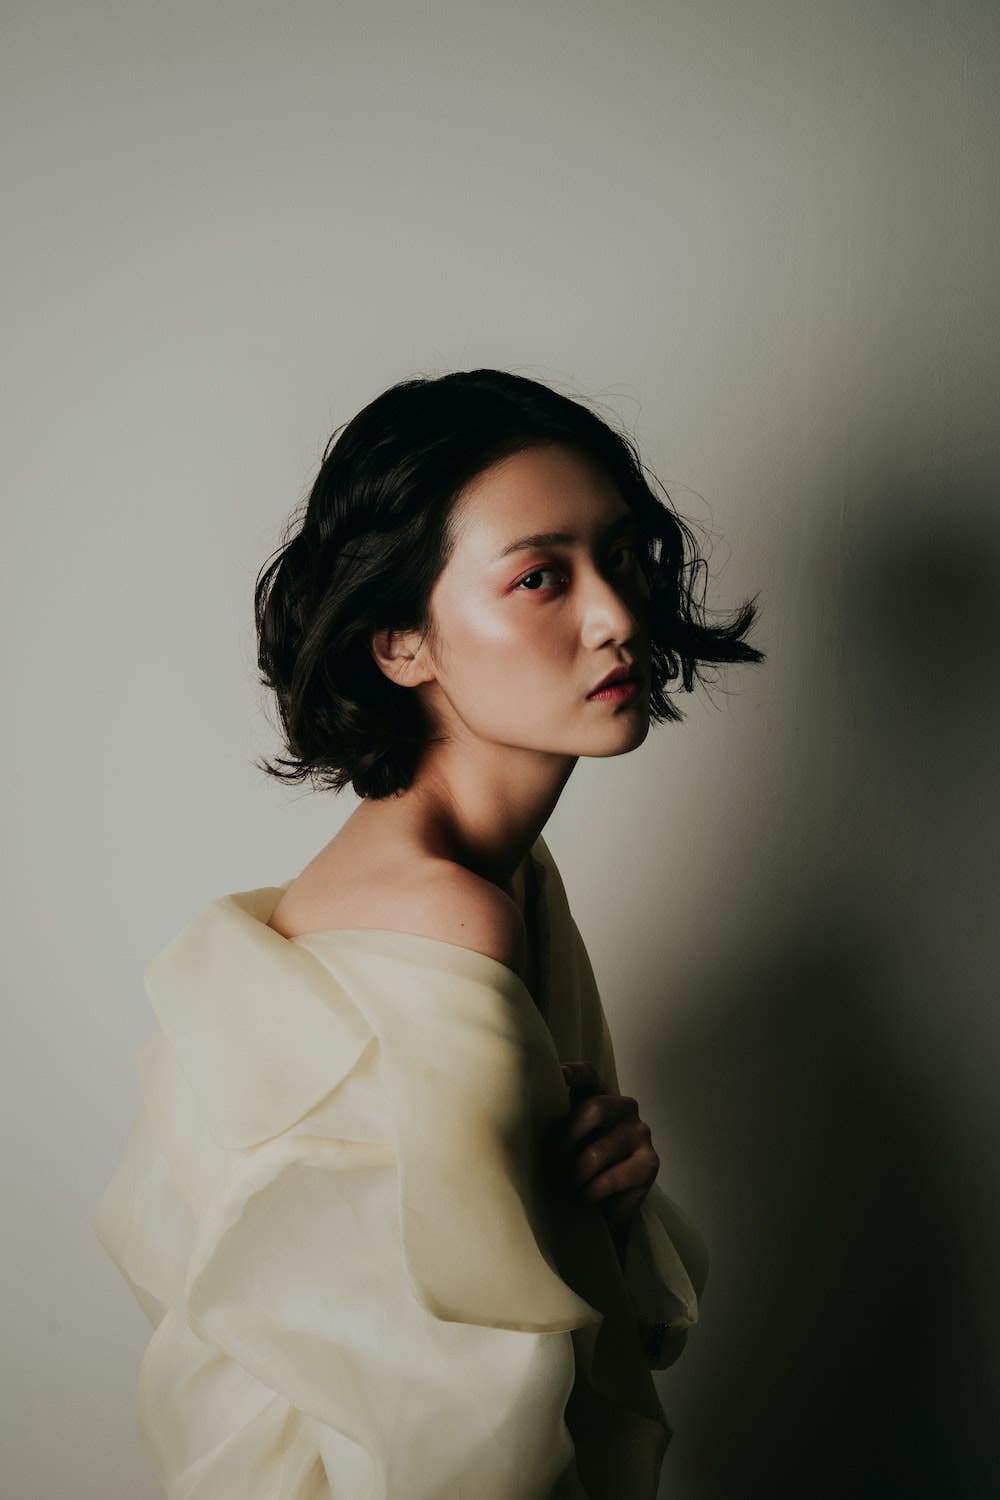
today’s photographers continue to look to history, employing classic poses that have been used by some of the biggest names in the business, from Edward Steichen to Richard Avedon.
These days, fashion and portrait photography are a mix of old and new poses that are constantly being reimagined. For some, these poses can become a vehicle for self-expression and reinvention.
Here’s a quick look at just sixteen of the most interesting and dynamic female poses gracing the pages of magazines and the walls of art galleries. Poses can be tools for expressing femininity and masculinity across all genders, so we encourage mixing-and-matching to find what poses work for you.
As you draw up your shot list, feel free to pull from traditionally male and female poses, find moments of overlap, gender-bending, and experimentation, and see what works best in conveying your artistic point of view. There are no rules here.
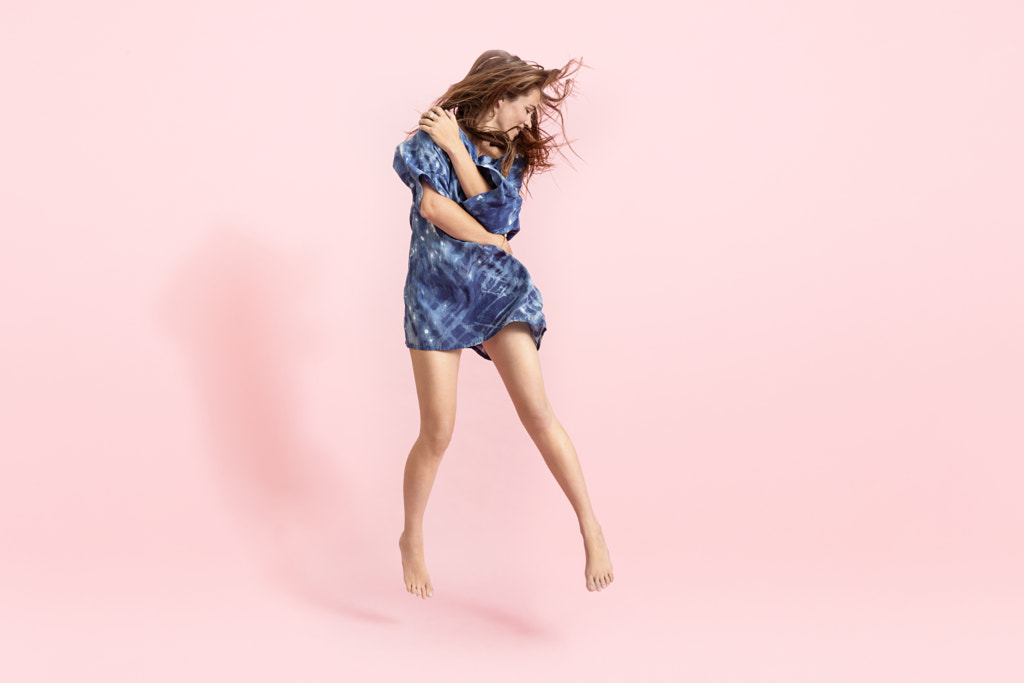
The jump
While jumps can be challenging to get right, they usually pay off. Just remember to use burst mode to capture those split-second moments; it might take your model a few times to get it right, so don’t be afraid to play and experiment. Ask her to pay special attention to keeping her hands and face relaxed, as they can clench up or become tense mid-jump.
Keep in mind that there’s no one way to execute a jump pose; you can go for long, outstretched arms and legs like Hepburn or tuck your knees
The turn-around
Believe it or not, the back-to-the camera trend dates all the way back to the turn of the 20th century, when it was all the rage among actresses and starlets. Scholars believe this might have been an early version of the classic glamor shot, and it’s stood the test of time for its playful and mysterious sensibility.
Like many of the poses on this list, there are a number of variations. Since the beginning, some have experimented with photos that focus solely on the back, while many others have preferred to add a coy look over the shoulder. You can even set up a mirror in front of your model so that we can see her face and the entirety of her back at the same time.
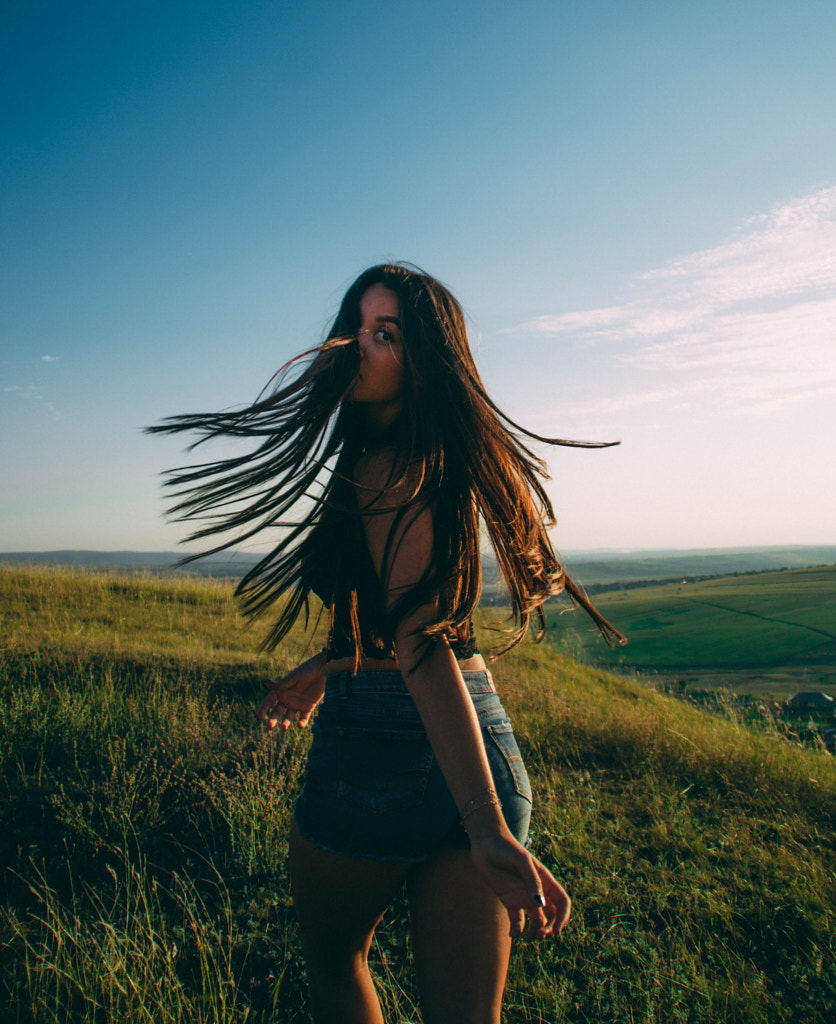
The hair-swish
If your model has long hair, use it to your advantage. By having her turn in circles or introducing a fan into the equation, you can get tons of different shapes. Remember to use a quick shutter speed or burst mode, unless you’re going for that pretty, intentionally blurred look. It doesn’t have to be your standard hair flip, either; it can be subtle or playful, exuding a spontaneous, impromptu vibe.
The criss-cross
This pose is a good one to start with because it’s simple and easy to do. Have your model stand up, either on her own or against a wall, while crossing one leg in front of the other. Often, that simple gesture will create a nice shape that’s more dynamic than your typical standing-straight pose.
The curb
Ask your model to stand on a curb or stairs (step ladders work nicely too) and step off to get that forward momentum. Keep an eye out for long legs and compelling angles/triangle shapes.
The s-curve
Historically, photographers have used sharp, clean lines to express masculinity and soft, smooth curves to convey femininity. If you want to go for curves, one way to get them is to ask your model to “pop a hip”; this gesture will cause her other knee to bend slightly. This pose can work especially well when your model is positioned at a 45-degree angle for some added depth.
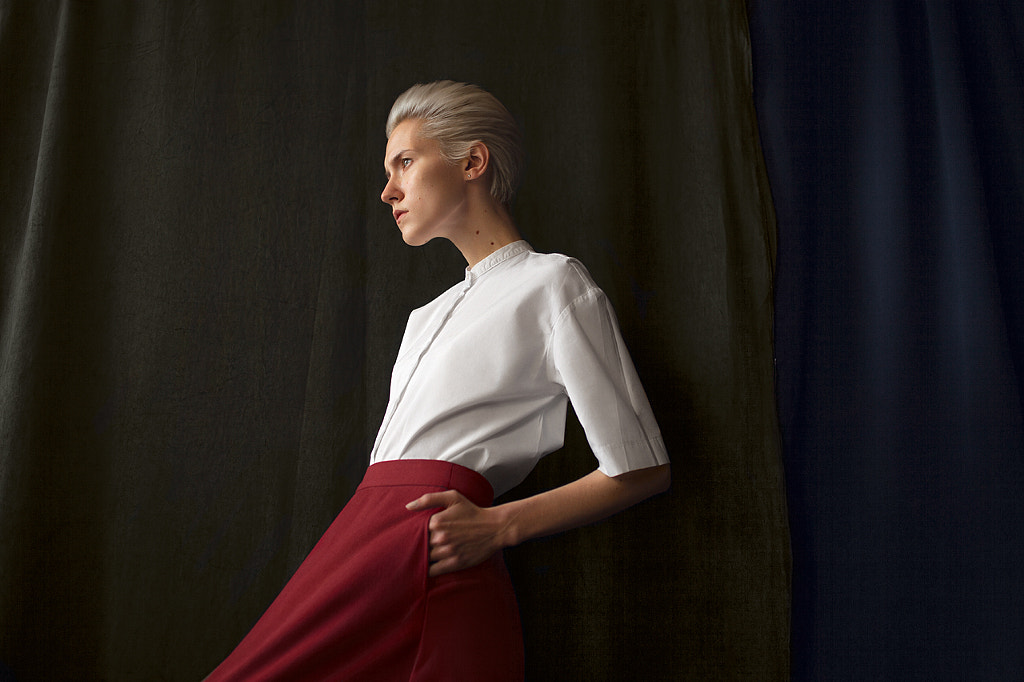
The tuxedo
This pose doesn’t require an actual tuxedo; we’re just borrowing the name from Yves Saint Laurent’s “Le Smoking” tuxedo suit, which caused quite a sensation when photographed for French Vogue by Helmut Newton.
The original 1975 Le Smoking photo, featuring the actor Vibeke Knudsen posing in Rue Aubriot, offered a radically new take on femininity, one characterized by clean, minimalist lines and an androgynous aesthetic.
Though it has since undergone many iterations, this pose boils down to a few basics. Have your model tuck one hand in her pants pocket while jutting one foot forward and leaning backward slightly. No cigarette needed. Bonus points for sleek, geometric clothing and androgynous, slicked-back hair.
The elbow-bend
Many photographers adhere to an “if it bends, bend it” policy for more curves throughout the body. For more definition and dynamism, have your model bend her elbows away from her body to create negative space and shapes around her.
You almost always want to have at least some separation between the limbs and the torso. Your model can do this by placing her hands on her hips or behind her head; she can also mix it up by putting one hand up high and the other down low, creating a different kind of s-curve.
The leg-pop
Remember when Angelina Jolie’s right leg became a trending topic after the 2012 Oscars, all thanks to that Atelier Versace gown and her signature “leg pop”? You can choose to go subtle or dramatic with this pose, depending on how far you extend the leg and bend the knee. It’s ideal for highlighting the length of the leg and giving it a sculptural appeal. A pointed toe is also a must, and, of course, the thigh-high slit is optional.
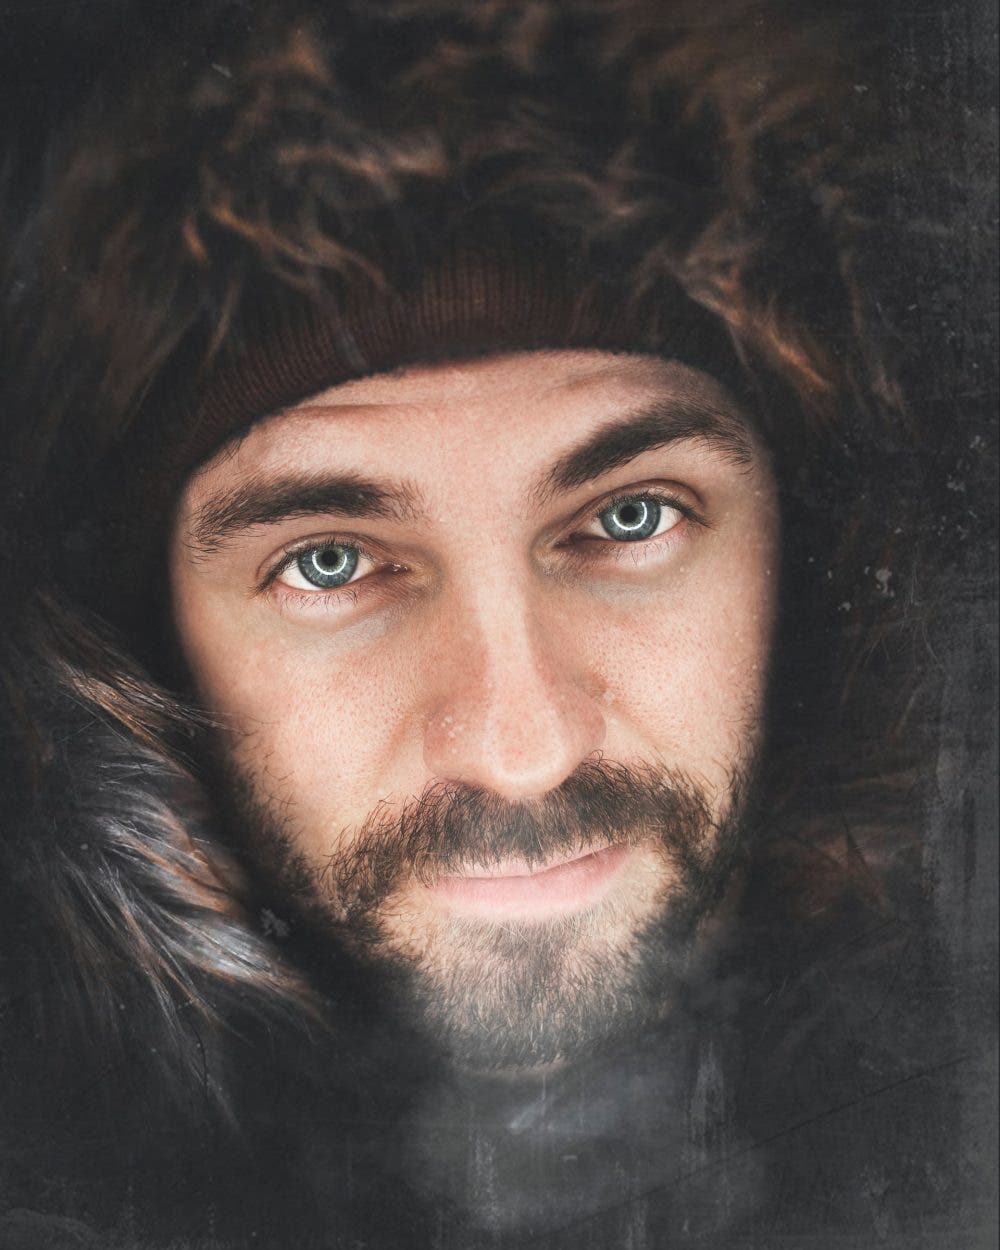
The hand-to-eye
Hands can be used on the face in a variety of ways, but one of the most effective is to use them to draw attention to your subject’s eyes. You can do it with one hand or both to frame the face; the legendary portrait photographer Platon used this technique in one of his unforgettable pictures of Michelle Obama.
A quick note about eyes: try not to have your model look at you through the corner of her eye, as this will minimize the iris and give you lots of white space in the eye. Instead, have her eyes follow the same direction as her nose for big, full irises with nice catchlights.
If you want to draw attention to the lips instead, move the hands and fingers down. This pose works best when the hands are photographed from the side and in a relaxed pose, since you want the fingers to look long and defined. Keep the touch light and delicate (ever heard the phrase, “ballet hands”? That’s what that means).
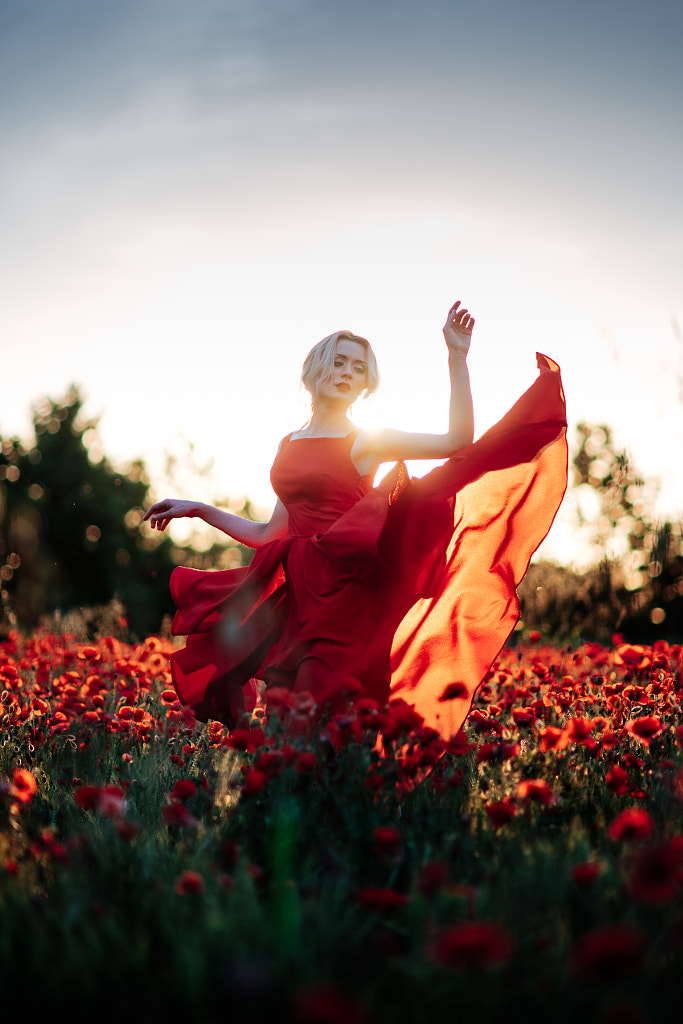
The dress-drop
If your model is wearing a dress, use it to create some flowing lines and shapes. To get that billowy look, you can have your model lift the fabric and let it fall to the ground, or you can ask an assistant to do it for her. Even if your model’s not moving, your photo will still have a sense of movement and momentum.
The shoulder-pop
This one’s popular in commercial beauty photography because it helps add that extra emotional frisson to close-ups. Ask your model to lift one shoulder and let the other one relax; it works best if her head is facing in the direction opposite the raised shoulder. You can also have her pop it slightly forward for some added depth.
The squat
Today, you can find this pose everywhere from celebrity Instagram feeds to the Grammys red carpet, but chances are it developed its roots in early hip-hop culture, documented in photographs by legends like Jamel Shabazz. It works well for hip, fashion-centric shots with a laid back vibe, and there are several ways to do it, so have some fun with it and see what works.
The stool
While this pose can work with chairs, a backless stool or bar chair is ideal because it’ll give your model more freedom to move around. Without a back to lean on, she’ll be able to lean forward and backward and engage her body for a more active posture.
It is a myth that working with off-camera flashes or a detachable camera flash is only for advanced and professional studio photographers. Nature and macro photographers should use external flash units from time to time, even if they take photographs outdoors and benefit from natural light. Portrait photographers should learn to use flash from their very first photographs, regardless of the environment they use. Flash is also an essential requirement for product and food photography, interior design pictures, and still-life artworks. That’s why I’ve compiled a comprehensive guide to working with off-camera flash to get you started.
Although having an off-camera flash can come in handy, the price for this type of equipment is high enough to make you think twice before buying it. Therefore, make sure you get one that suits your needs but most of all, learn how and when to use it.
Why and When You Need an Off-Camera Flash
An off-camera flash is any flash unit that is not the built-in flash of your camera. An off-camera flash can be mounted on the camera or lens, or placed anywhere around the subject. Typically, an off-camera flash is better than the built-in flash and provides more features. However, this isn’t the main reason for which you buy one.
You want an off-camera flash because it increases your freedom of expression. With an artificial light source at hand, you can take great photographs in less-than-perfect lighting conditions without compromising other settings such as ISO and shutter speed. Furthermore, you control the intensity and direction of the light, which allows you to aim for more creative compositions.
Instead of always lighting the subject directly from the front — as with the internal camera flash — you can use whatever lighting angle you want: back-lit, front-lit, or side-lit.
The Best Kind of Off-Camera Flash for Your Photography Style
When you choose an off-camera flash, you have to take into consideration your subject matter and photographic style.
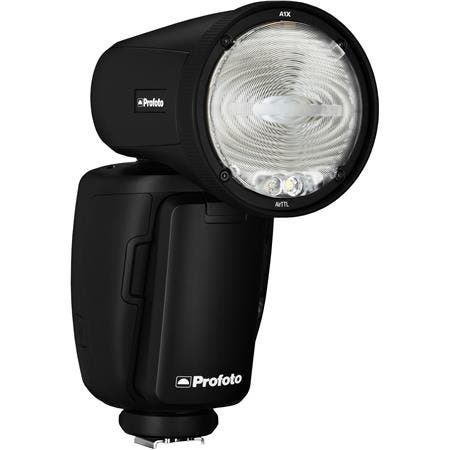
Single External Flash
The most versatile off-camera flash is a speedlight flash, which produces a burst of light similar to the built-in flash. You can use flash with any subject matter. However, the trick is to make it look natural and subtle. The easiest way to do this is by mounting the external flash in the camera’s hot shoe and pointing the flash up into the ceiling. You can’t change the direction of the internal flash. However, this simple change of direction of the flash and bouncing the light off the ceiling will evenly illuminate the room with soft light and make your image look like there was enough light to begin with.
It is a very easy way to use flash. However, bouncing light off the ceiling doesn’t work if there are low-hanging lamps in the room. Otherwise, it is a great and simple way to start using an external flash.
If you photograph children or pets, don’t get the flash too close to their eyes. Portrait photographers also prefer to keep the flash away from people’s eyes because it helps avoid red eyes and strange-looking skin tones. The easiest way is to place the flash off to one of the sides to avoid red eyes and create a bit more depth in your subject.
Candid photography (i.e., street photography, photojournalism, event photography, etc.) requires a fast and flexible approach like this with the external flash mounted in the hot shoe of your camera.
A speed light isn’t necessarily attached to the hot shoe of a camera. Furthermore, it is much more powerful than the built-in flash, gives you more control over the light, and has an adjustable angle. You can place it anywhere in the vicinity of the subject and trigger it when you press the shutter by letting the internal flash act as the trigger. However, with this setup, the internal flash will both trigger the external flash and affect the lighting, which might not be what you want.
Using a Wireless Flash Trigger System
A speedlight with remote triggers is useful when you control the scene. Having control means having the time to set up a lighting system and a subject to wait for you. Use it with static subject matters (e.g., still-life, food, products) and human models. Most wireless flash trigger systems allow you to trigger multiple flashes with different settings, so you can sculpt the light as you want it.
There is also a wired option in which you use a TTL flash cable to connect a single external flash with the hot shoe of the camera. It’s a wired version that permits placing the flash at around 3 meters from the camera. But compared with the up to 100 meters of range of a radio-frequency trigger, it’s not so much.
Ring Lights for Artistic Purposes
Ring lights are an exciting option for portrait photography. However, they attach to the front of the lens and thus provide less versatility than a speedlight. Instead, you get a soft and uniform light that wraps around the subject and softly fades into the background. Furthermore, you can create circular catch-light in the subject’s eyes.
Light Stand
If you choose to place the flash off the camera, you will need something to place it on. You can, of course, use anything you have at hand, from furniture to rocks, tree branches, or have someone assist you. The easiest method is to use light stands. Like the camera sits on a tripod, an off-camera flash sits on a light stand. And also, like tripods, light stands provide stability and versatility.
Light Modifiers
You should also consider other flash accessories such as diffusers and light shapers. Diffusers are simple boxes that you place on the flash cap to create a smoother and softer light. Usually they are white, but you can also find colored diffusers that slightly change the color temperature of light.
Light shapers are more advanced accessories that modify the light, making it softer and diffused (e.g., umbrella, scrim, softbox), or, on the contrary, harsher (e.g., grid spot, beauty dish, etc.). They are used often in studios where setting up lights can take as much as you need and it doesn’t change very often.
To change the color temperature of an off-camera flash, you can use color correction gel on your flash. For example, to create a warmer light, you need Color Temperature Orange (CTO) gels. They come in various strengths and change the standard color temperature of the flash (5500 °K) to one between 2900 °K and 4900 °K. You can also use blue-colored gels to create a cooler look.
This is where your lighting can get very creative. Use a flash with one colored gel to light your subject and another external flash with another colored gel to illuminate the background.
Concluding Words
Working with flash isn’t easy, but the results are amazing. Off-camera flashes allow you to take pictures in otherwise impossible conditions, mix ambient and artificial light for stunning effects, and create more interesting compositions. You can use them for creating natural-looking photographs or abstract artworks. Working with flash adds a new dimension to your visual story and enhances the narrative. It isn’t a technical skill — it’s a storytelling skill.
A bright, white background creates a high energy, happy, and distraction free scene, perfect for pictures of your friends and family. Known as high key photography, this technique instantly cures problems with ugly backgrounds and focuses the viewer’s attention on your subject.
Besides being a popular for portrait photographers, it’s a more modern choice, rather than traditional (ie., painted muslin). Here are my favorite tips for creating high key photos.
Tip #1 – Use a Solid White Background to Eliminate Distractions
I used a big, white piece of paper as the background for this portrait of my twin nieces because anything natural for a background would have clashed with their colorful outfits. The brightness also perfectly matches their expressions.
.
The solid white background eliminates all distractions
High key photography was the perfect choice for this picture of my daughter eating a strawberry because there’s nothing to distract the viewer from her eyes and the strawberry. You don’t need to use an expensive camera or lens for this type of picture, because you can use any camera for high key photography.
Tip #2 – use sunlight as your background
A white background isn’t everything you need to create a perfect high key photograph, however. You need one additional ingredient – light. A white background without light doesn’t appear white in the photo, it appears grey. My flash failed to fire for this next photo, causing an ugly, grey background.
To create a solid white background, you need to completely overexpose your background without overexposing your subject. That means you’ll need much more light on your background than on your foreground subject; about 16 times more light (or four stops of light).
Fortunately, we all share a very powerful and free light source: the sun.
Tip #3 – use a flash on the background
Another easy way to create a bright background is to light it with an off camera flash. Simply move your model four to six feet away from your background and hide a flash behind your model, pointing it at the background. When you take your photo, the flash will light the background to overexpose it and make it appear completely white.
.
Place a flash behind your subject to light the background
An off camera flash doesn’t have to be expensive. Any manual flash with an optical slave will work, including the $60 (US) YongNuo YN-560 that I often use. Simply turn on both the flash’s optical slave and your built-in flash. When you take a picture, your flash will trigger the off camera flash to light the background.
Tip #4 – don’t over, overexpose the background
.
If you have too much light on your background, it’ll wash out your subject
You can overexpose a high key background too much. If you bounce too much light off your background, the backlighting will overtake your model and wash out your picture. For example, the picture on the left had too much light on the background, while the picture on the right had just the right amount.
To get a perfectly white background without washing out your picture, start your background light at its lowest power and increase it one stop at a time until the background is barely overexposed.
The main lens is 108MP, the telephoto lens is 48MP (with 10x optical zoom), and the Ultra-Wide lens is 12MP. It also has a Time of Flight sensor. A 40MP selfie camera is on the front.SINGLE TAKE: TAKE ONE SHOT, GET MULTIPLE FORMATS
When using Single Take, the camera will capture up to 10 photos and four videos, depending on how long you choose to record.Single Capture is a new mode that shoots a 10-seconds video and then presents you with a whole variety of photos and smaller video clips, all shot with different zoom levels and some with different effects like black and white already applied.The idea is that you shoot a little scene in front of you — say, someone is jumping into a pool – and instead of having to decide in advance to just take one image, Single Capture takes a whole bunch of different shots for you to choose from all at one go.You can then select the shots you want to save as they are, or use the software to automatically combine them into a little highlight reel you can instantly share with your friends or family.HOW TO USE THE GALAXY S20 SINGLE-TAKE FEATURE:To start the camera, navigate to and open the Camera app, and then tap SINGLE TAKE. Tap Capture. When Single Take is activated, the camera will utilize multiple functions at once, including Best Shot, Ultra-wide Shots, Live Focus, Filter, and Smart Crop. The videos will use motion photos, bounce and reverse, and Hyper lapse.After you’ve taken your shots you can select a thumbnail, and then tap Favorite (the heart icon) to set it as your favorite of the bunch.To access additional editing options with Single Take, touch and hold the thumbnail you’d like to edit. Tap Best shot (the crown icon) to set a clip as the best-looking photo. Tap Save to add the thumbnail to your Gallery and delete the rest. Tap Share to send your video or clips to friends or a social media app.You can also create a movie by tapping Story Video Editor, and then choose from Highlight reel to show off the best moments from your clips, or Self-edited if you’d like to trim the video yourself. In Story Video Editor, you can customize your video by adding text or music. NIGHT MODE – BRIGHT NIGHTThe main camera sensor has an astonishing 108-megapixel resolution. It can combine nine pixels into one single pixel that, according to Samsung, captures a lot more light. The result is a 12-megapixel image that even in the darkest conditions should come out well-exposed.The new Galaxy S20 phone Series also offers improved low light photography, stability, and zooming functions. If you want to take a selfie or video while out with your friends after dark, use Night mode for a high-quality shot without any distortion.How does it work?In low light, the pro-grade camera system captures multiple photos at once, merging them into one stunning shot with minimal blur and noise. With larger image sensors and AI, switching to Night Mode means you can shoot luminous nighttime scenes without flash, even in low light.Galaxy S20’s Space Zoom technologyWith the Galaxy S20’s Space Zoom technology, even when you are far away, you can zoom in close. Use up to 30x zoom on the Galaxy S20 and S20+ with Space Zoom, the AI-based Super-Resolution Zoom, or step-up to 100x Space Zoom, with the folded lens on the S20 Ultra with 10x Hybrid Optic Zoom.You can zoom in from at least 100 feet away using the Galaxy S20 5G and Galaxy S20+ 5G models and still capture the details on your subject. Use the Galaxy S20 Ultra 5G’s advanced zoom while standing 300 feet away and still get that perfect, clear shot.Once you’ve taken your photo, tap the Edit icon to crop it. Touch and drag the corners of the photo until you are finished cropping, and then tap Save.Once you tap on the different modes, the phone will give you several new zoom options such as 3x, 5x, 10x, and so on. The Galaxy S20 Ultra 5G goes a step further and lets you try the ultimate Space Zoom mode.All you have to do is make sure that your hands do not shake much.However, if you are not a fan of the new options, you can switch to the old method of pinch-in and pinch-out. When you do that, you will see a small counter at the edge of the screen. Once that appears, slide over it to get the shot you desire. HOW TO CAPTURE AWESOME WIDE-ANGLE SHOTSThe wide-angle shooter makes plenty of things look amazing. Just aim your camera to a wide spot, switch to the wide-angle mode (0.5x zoom), and you will soon see the magic. However, that’s not the only new thing that is possible with the new Galaxy S20 phones.
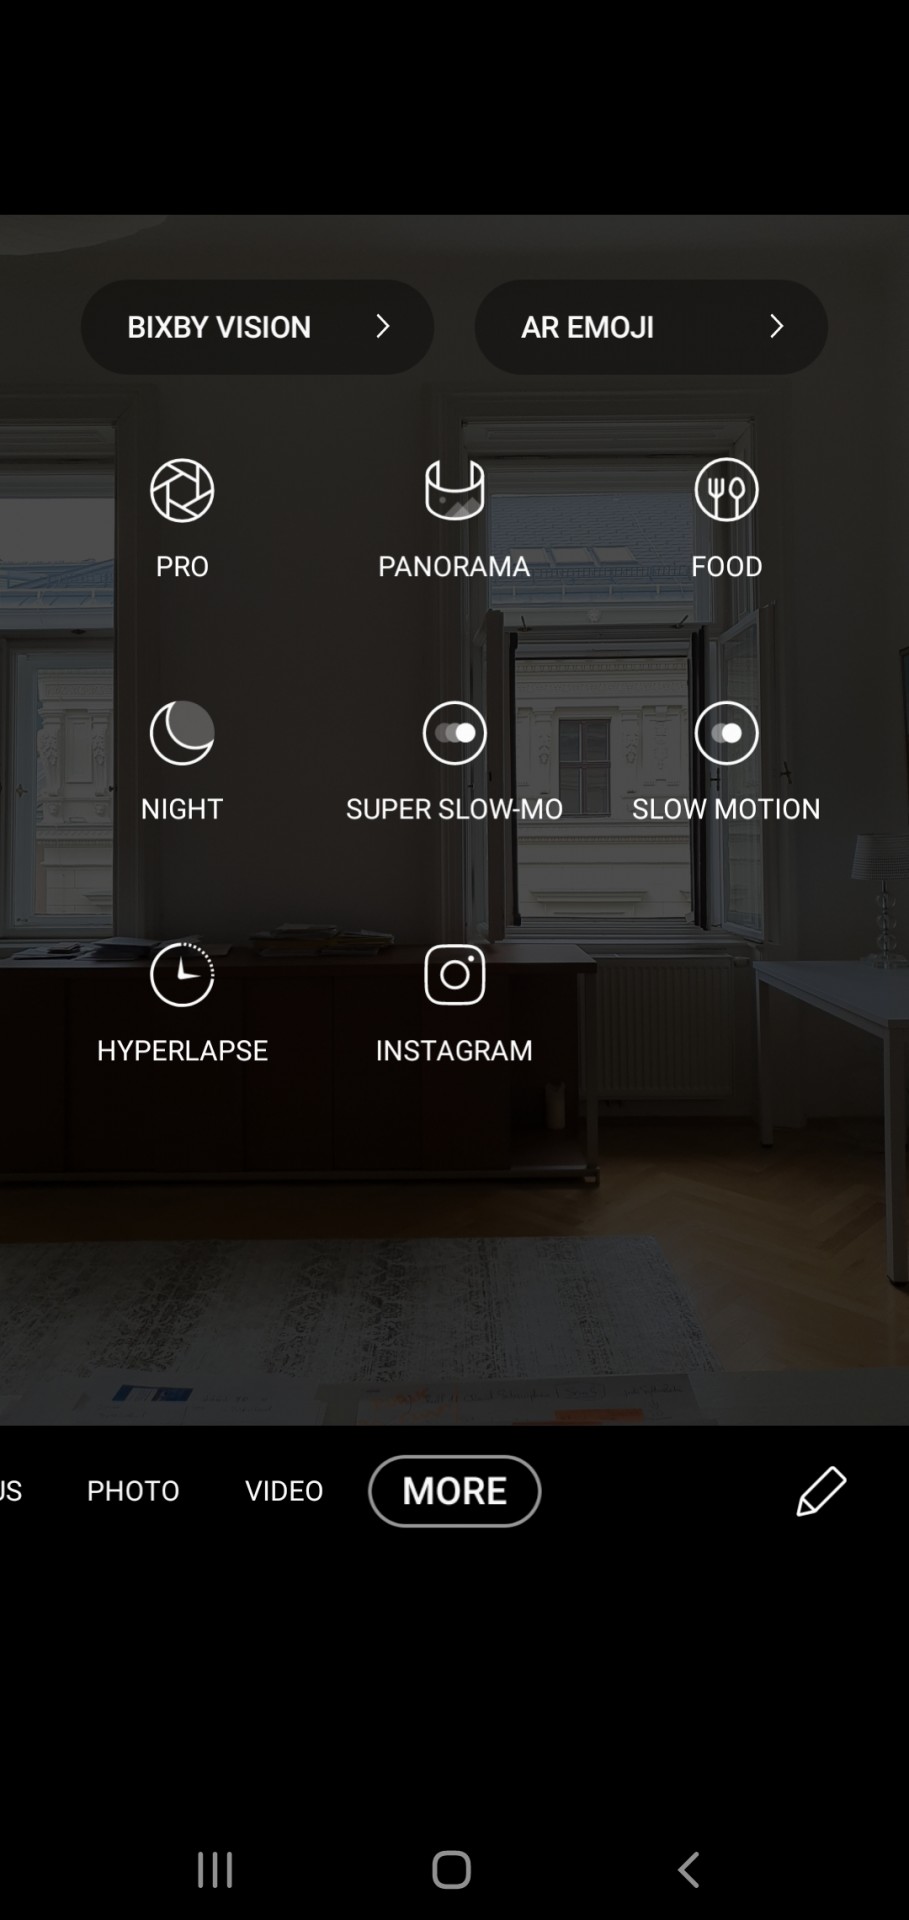
Take a 108MP photo with the Galaxy S20 Ultra like a bossThe big deal about the Galaxy S20 Ultra is its main 108MP camera sensor. However, you don’t take 108MP pictures by default – you have to manually enable this camera mode. To do that and take a 108MP photo, simply tap on the aspect ratio icon at the top bar of the camera interface and choose the respective capture mode. Have in mind that 108MP takes up significantly more space than regular images and you can’t zoom in or out while in 108MP shooting mode. How to take a 40MP selfie on the Galaxy S20 UltraThe Samsung Galaxy S20 Ultra also has an impressive 40MP selfie camera, which is capable of producing images with amazing detail. It’s true that selfies are often better when they show as little detail and imperfections as possible, but technology is moving forwards and it’s not really worth it to be left behind, so better get along with the times. To take a 40MP selfie, hit the aspect ratio button on the top bar of the camera interface, then select the respective capture mode.Selfie tone EffectSelfie tone is a new hidden feature that lets you tint the overall tone of your selfies with a cool, warm, or neutral tint. The same effect can be achieved with any third-party image-editing app as well. It’s great of Samsung to include this feature.How does it work? To change Selfie Tone, open your selfie camera, then scroll down to Useful features, where you’ll find the Selfie tone menu.GROUP SELFIE UISamsung has bundled a cool Smart selfie angle, which automatically switches the front camera to the wide selfie mode when it detects two or more faces in the frames. We tried this feature several times and can safely say that the transition is seamless, and the results look great. Activate the feature from the settings. Simply tap on the Settings cog and toggle the switch for the same.How to Rearrange camera modesFeeling like changing up the camera interface layout? Samsung’s got your back! Simply swipe all the way left until you reach the More sub-menu where all non-essential camera modes are situated and hit the pencil icon. After that, you can simply drag and rearrange the different modes that appear as large icons down where they’d be more easily accessible.
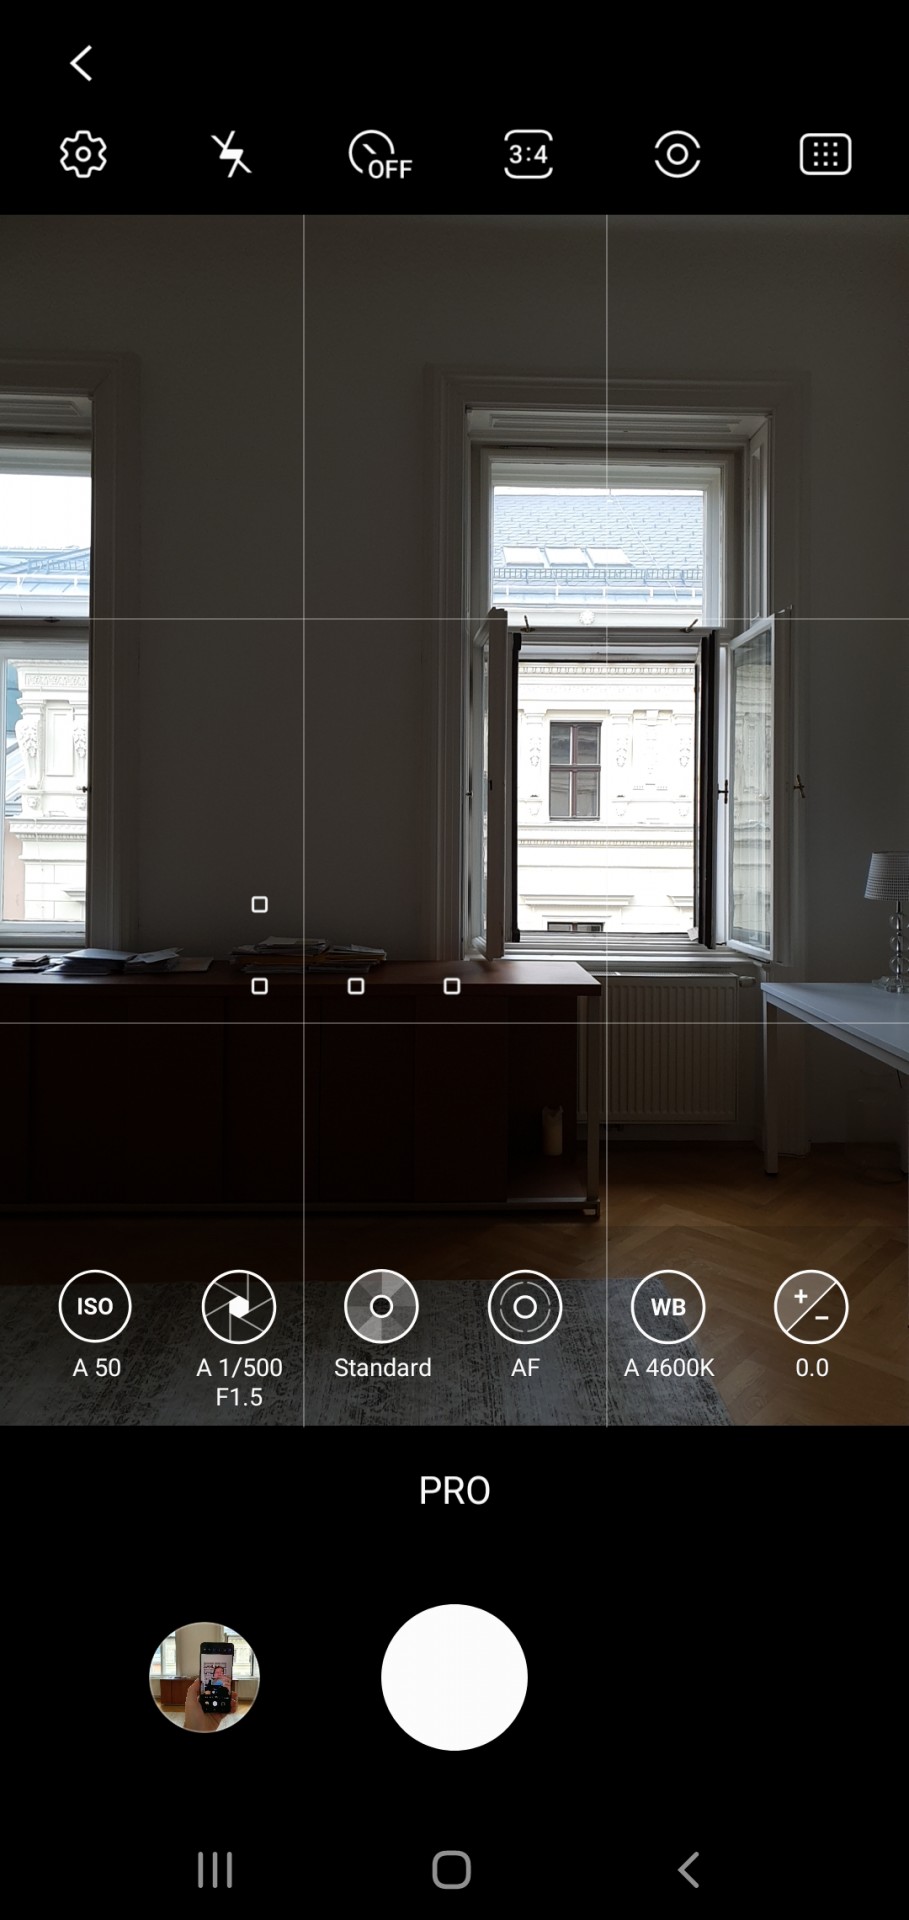
How to use the PRO MODECraft your content with a pro-grade tool set made for masters. Control the way you capture with the options at your fingertips in Pro Mode. Just like on a DSLR, you can manually adjust settings like ISO, shutter speed, and exposure level to your heart’s content.
How to use MY FILTERSUse the My Filters feature to create your own filters for your photos or videos. Take an existing photo that you like, and apply the colors and styles to another photo as you capture it.If you’ve seen another photo with an effect that you admire, just add it to your Gallery and use it to make your own filter. Up to 99 custom filters can be created and saved to your phone. How to CREATE YOUR CUSTOM FILTERYou can create a custom color filter on the Galaxy S20 series. So, if you like the color profile of a particular photo, you can have it as the base for your next photos.To create a filter, click on the Filters icon at the top-right corner and select My Filters from the list. Tap on the Plus icon and select the base picture of your choice.SPECIAL VIDEO Tips & Tricks
8K VIDEOGet the highest-resolution video on a smartphone. Samsung has revolutionized the resolution for mobile video, taking it from 4K all the way to 8K. That’s 4 times bigger than UHD and 16 times bigger than HD. That’s right, moving images that keep their super-sharp resolution even on your Samsung TV screen.The Galaxy S20 offers stunning 8K video shooting, so users can capture their world in true-to-life color and quality. When you are done shooting, stream your video to a Samsung QLED 8K TV and enjoy a best-in-class viewing experience or grab a still from an 8K video and turn it into a high-res photo. And even the bumpiest videos look like they were shot using an action camera, thanks to Super Steady and its anti-rolling stabilization and AI motion analysis.
Take Live Focus videoThat’s not a tip in the traditional sense of the term, but more of a public service announcement – Live Focus videos on the new Galaxies are now actually usable. Unlike previous iterations of the feature, which were mostly hit or miss, the Galaxy S20, S20 Plus, and S20 Ultra now consistently isolate the subject from the background and apply the bokeh effect evenly. Here’s a sample that we took a while ago:How to take a Super steady videoThe default video stabilization of the Galaxy S20-series is already excellent, but to achieve an even more stunning result, make sure to enable Super steady video. It’s great, but as we already mentioned in our review, Super Steady uses a crop of ultra-wide cameras to achieve that, and with that decision comes to a slightly degraded camera compared to regular video.To enable Super steady, simply tap the “electrocuted hand” icon at the top of the camera interface.
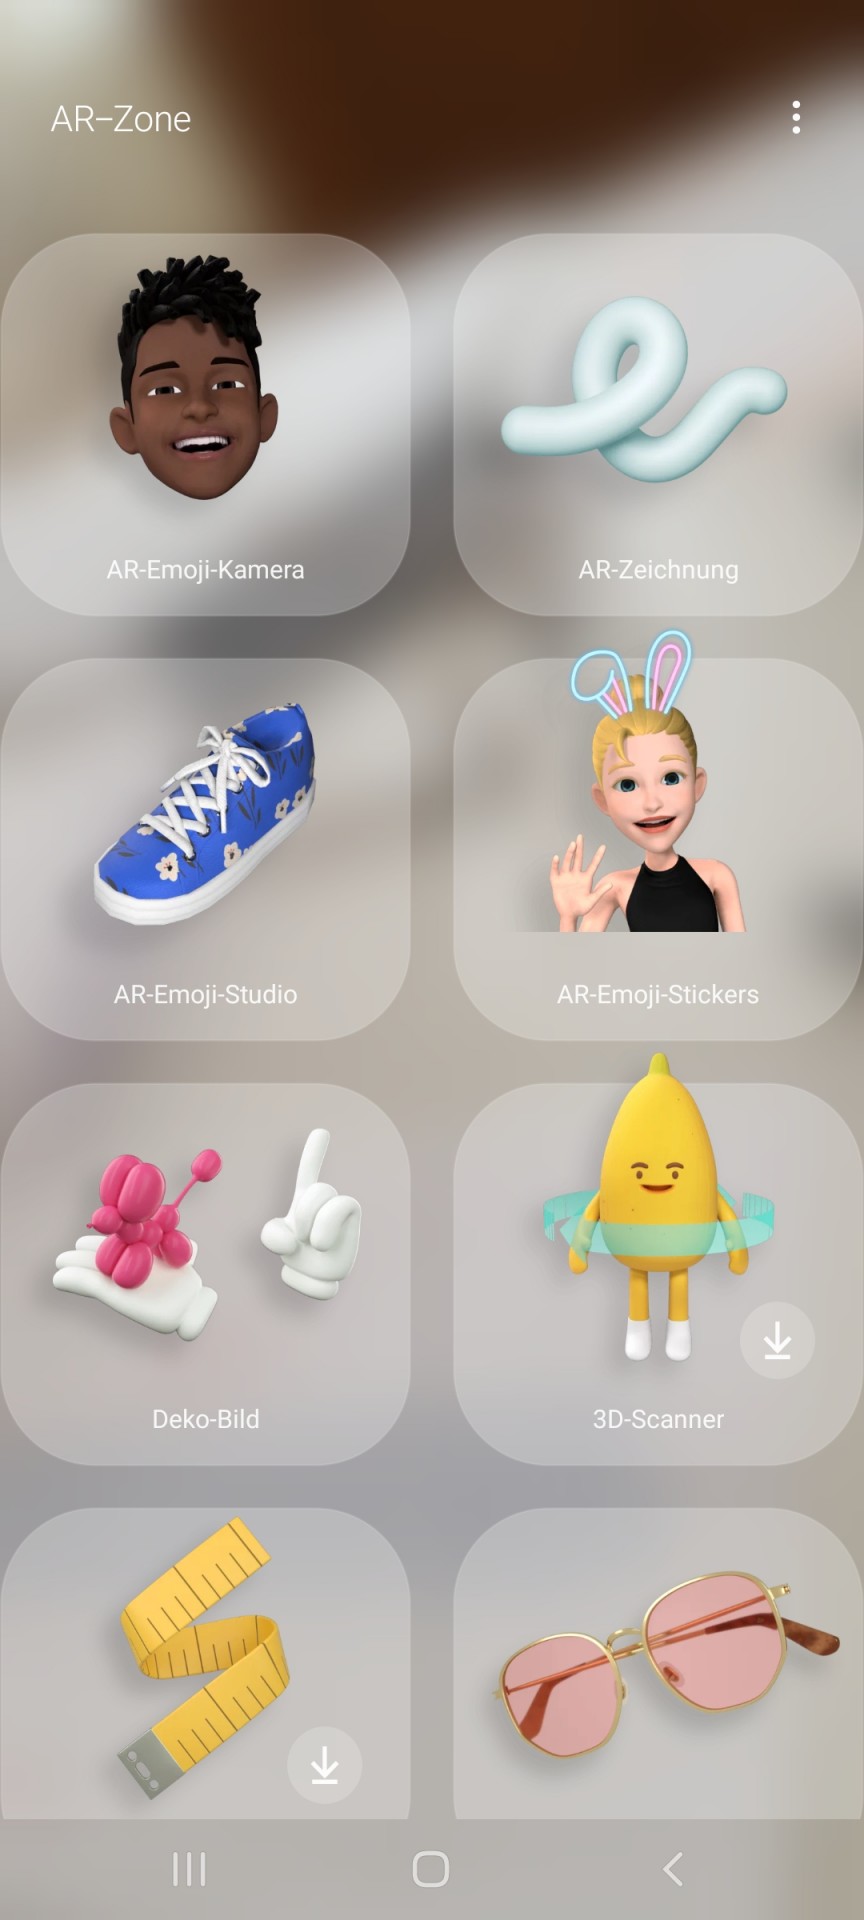
SUPER STEADY MODE AND 8K RECORDINGOne of the best features of the Samsung Galaxy S20 series is the Super Steady mode. As its name implies, it lets you shoot really-really steady videos.All these are made possible by the built-in anti-rolling features (up to 60 degrees) and AI motion analysis. So the anti-rolling and AI motion analysis will work together whenever you are capturing videos while running or from a car. And the good news is that it doesn’t crop out the edges. To enable it, simply tap on the Hand-shaped icon at the top.How to Enable Zoom-in micZoom-in mic is a great feature that amplifies volume and reduces background noises as you zoom in on while shooting video. It’s great and it’s definitely better to leave this one enabled rather than disabled, but do have in mind that this feature cannot be used with Live focus video, Super steady, or with the front camera. To enable this feature, open the camera in video mode, hit the settings cog at the top bar, then head to Advanced recording options. From there, simply toggle the zoom-in mic feature at the bottom.BONUS Create GIFs with a swipeFirst of all, it’s pronounced with a hard “G” (just like a gift, but without the “T”), and secondly, all-new S20 models allow you to quickly create a GIF by simply flicking down the shutter button. The resulting GIF is a pretty low-quality one, but hey, more power to you!To enable this feature, open your camera app settings, then look for “Swipe Shutter button to edge to” under the Pictures sub-menu. By default, it should be set to “‘Take burst shot”, but tapping it would lead you to change it to “Create GIF”.Augmented reality on the Galaxy S20-seriesAny and all AR-related camera features have been migrated to a new section within the camera interface. To access these, swipe right until you get to the “More” section within the camera app, and lo and behold, the AR Zone menu will be visible at the top row. From there, you can access various AR-related features. AR Emoji Camera, AR Doodle, and AR Emoji Stickers are certainly well-known to long-time Galaxy owners, but 3D Scanner and Quick Measure are arguably a bit more useful and exciting. The former lets you capture a three-dimensional scan of a real-life object by rotating your phone around it to capture a quick scan, whereas Quick Measure lets you… measure distances using the ToF camera at the back. Fairly reliable, but don’t count on it when purchasing a new sofa.
The VerdictThe S20 series’ cameras are packed with new features that are simple to use and will take your video and selfie skills further. It’s easier than ever to post exciting and personalized content to your favorite social media app with Single take photos. Enable Night mode when shooting outside in the evening, and use advanced zoom from hundreds of feet away without sacrificing quality.
I’m a little embarrassed to admit this, but checking Instagram is one of the first things I do in the morning.
But, I know I’m not alone.
In fact, it’s one of the most popular social media platforms in the world. So, you might be wondering, “How can I use this platform?”
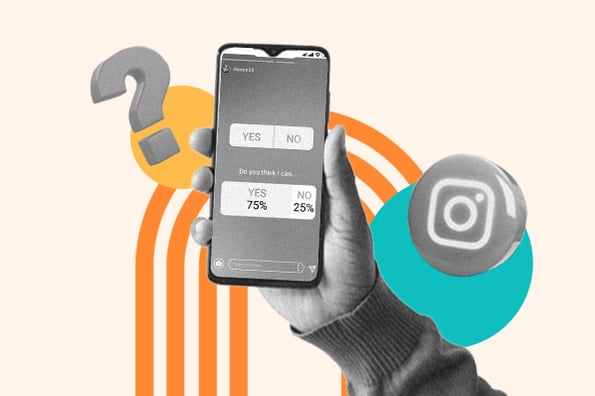
Well, a great way to engage with your audience is through an Instagram poll.
Quiz or poll stickers are one of the most popular Instagram Story formats. Polls are a great way to keep in touch with your audience and even conduct market research.
How To Do a Poll on Instagram
Open Instagram and swipe left.
Make sure you’re posting to Story (underneath the record button).
Take the video or picture you want to post.
Click the sticker icon on the top right.
Scroll down and choose poll or look for the sliding poll.
Type in the question and responses.
Click Send To and then share your poll to your Story.
Track results.
1. Open Instagram and swipe left.
To get started with Instagram polls, the first thing you need to do is open the app. Then, you’ll swipe left. This will take you to the screen where you can post on your Stories.
2. Make sure you’re posting to Story (underneath the record button).
Once you’re here, make sure that you’re posting to your Story. Underneath the record button, you’ll see whether you’re posting a Story, a Reel, or going Live.
To post a poll, make sure you’re posting to your Story.
3. Take the video or picture you want to post.
Now, just take the video or picture you want to post.
If you have it saved, you can just select the content from this screen by clicking on the picture icon on the bottom left. This will take you to your camera roll where you can select a video or image.
4. Click the sticker icon on the top right.
To add the poll, click on the sticker icon on the top right. It’s the third icon from the left.
5. Scroll down and choose poll or look for the sliding poll.
Now you should see different sticker options including location, time, questions, and more. Scroll down and choose the poll icon.
You can either do a question and answer poll, or a sliding poll. To choose a sliding poll, you’ll want to scroll until you find the slide bar option.
6. Type in the question and responses.
If you chose the question and answer poll, it’s time to type in your question and the possible responses.
If you chose the slide bar, you’ll want to type in your question and then add an emoji to the sliding bar.
7. Click “Send To” and then share your poll to your Story.
Now all that’s left to do is post. To do this, just click “Send To” and then share the post on your Story.
8. Track results.
Once you’ve posted a poll, it’s time to wait for the responses. To view the results, you’ll want to watch your Stories.
Then, click the “Seen by” icon in the bottom left corner. This will show you who voted and the results.
Here, you’ll also see a button to “Share Results.” You can click that and post the results to your Story to let your viewers know the outcome of the poll.
When you’re creating a poll, remember to place it strategically.
You don’t want people to have problems voting because of the placement. Make sure your poll is placed near the center, and not too high or low that the other Story icons block it.
As you can see, posting a poll on Instagram is a simple process. But, how do you use this feature?
Here are some of the top ways you can use Instagram polls:
Learn about your audience. Polls are a great way to talk to your followers. You can learn about their interests and opinions using a simple poll.
Market research. Instagram polls can also help you discover what your audience wants to see from your brand. For example, I’ve seen a powder protein company ask questions on what flavors customers want to see and then deliver on those flavors. This makes your audience feel like they’re a part of a community and like you value their opinion.
Gather feedback. If you want to know what your customers think, why not just ask them? You can use polls to gather feedback and information from your followers.
Share your content. Instagram polls are a great way to get your audience interested in the content on your site. Hopefully, the poll will strike enough interest that your followers go to your site to see a blog.
Enter a giveaway. I’ve seen plenty of influencers use the sliding bar to gather giveaway entries. After posting a few Story slides on the giveaway, the last slide usually says, “Slide this bar so I know you entered.”
Increase engagement. Polls are very helpful for the Instagram algorithm. The more engaged your audience is with you, the more likely they are to actually see your content in their feed.
Ultimately, the point of using Instagram polls is to engage with your followers and capture their attention.
You’ve heard people talk about how to do the sexy part of exporting—the research, the schmoozing, the travel and all the marketing and sales stuff that people think about when they think about the glamour of international trade.
But what I want to talk about is the not-so-sexy part of exporting: the basic export documents required for international shipping. It’s the stuff you need to do—and do correctly—to successfully deliver goods and make money. I’d argue that this not-so-sexy part of exporting is more important than the sexier side but maybe that’s just because it’s what I’ve been focusing on for more than 5 years.
With that in mind, here are 11 standard shipping documents for export that you need to understand in order to be successful.
Proforma Invoice
Commercial Invoice
Packing List
Certificates of Origin
Certificate of Free Sale
Shipper’s Letter of Instruction
Inland Bill of Lading
Ocean Bill of Lading
Air Waybill
Dangerous Goods Forms
Bank Draft
Learn more about the dozens of exporting forms you may need to complete in order to ship your goods. Download The Beginner’s Guide To Export Forms.
1.Proforma Invoice
In a typical export exchange, everything starts when you receive an inquiry about one or more of your products. That inquiry may include a request for a quotation.
If the inquiry came from a domestic prospect, you probably have a standard quotation form to use. However, in an international transaction, your quote would be provided as a proforma invoice. That’s because your international prospect may need a proforma invoice to arrange for financing, to open a letter of credit, to apply for the proper import licenses and more.
A proforma invoice looks a lot like a commercial invoice, and if you complete it correctly, they will be very similar indeed. A proforma invoice specifies the following:
The buyer and seller in the transaction.
A detailed description of the goods.
The Harmonized System classification of those goods.
The price.
The payment term of the sale, which would typically be expressed as one of the 11 current Incoterms.
The delivery details, including how and where the goods will be delivered and how much that will cost.
The currency used in the quote, whether it’s U.S. dollars or some other currency.
Be sure to date your proforma invoice and include an expiration date. There can be a lot of volatility in the export process, so minimize your risk by setting a specific time frame for your quote.
2. Commercial Invoice
Once you’ve sent a proforma invoice to your international prospect and received their order, you need to prepare your goods for shipping, including the paperwork that must accompany the goods. Of those documents, the commercial invoice is one of the most important.
The commercial invoice includes most of the details of the entire export transaction, from start to finish.
I often get questions from people who look at this sample commercial invoice and wonder why it looks so different from the invoices their company uses for domestic orders. Keep in mind that the invoices you create from your company’s accounting or ERP system are accounting invoices used to get paid, not export invoices.
The commercial invoice may look similar to the proforma invoice you initially sent your customer to serve as a quote, although it should include additional details you didn’t know before. For example, once you have the commercial invoice, you probably have an order number, purchase order number or some other customer reference number; you may also have additional banking and payment information.
Make sure to include any relevant marine insurance information and any other details that will ensure prompt delivery of the goods and full payment from your customer.
3. Packing List
An export packing list may be more detailed than a packing list or packing slip you provide for your domestic shipments. It may be used in the following ways:
Your freight forwarder may use the information on the packing list to create the bills of lading for the shipment.
A bank may require that a detailed packing list be included in the set of documents you present to get paid under a letter of credit.
Customs officials in the U.S. and the destination country may use the packing list to identify the location of certain packed items they want to examine. It’s much better that they know which box to open or pallet to unwrap rather than needing to search the entire shipment.
The packing list identifies items in the shipment and includes the net and gross weight and dimensions of the packages in both U.S. imperial and metric measurements. It identifies any markings that appear on the packages, and any special instructions for ensuring safe delivery of the goods to their final destination.
If cargo is lost or damaged, a packing list is required to file an insurance claim, and it is also used if there is a disagreement between the carrier and the exporter regarding the weight or measurement of the cargo.
4. Certificates of Origin
Some countries require a certificate of origin to identify in what country the goods originated. These certificates of origin usually need to be signed by some semi-official organization, like a chamber of commerce or a country’s consulate office. A certificate of origin may be required even if you’ve included the country of origin information on your commercial invoice.
Usually a chamber of commerce will charge you a fee to stamp and sign your certificate or require you to be a member of the chamber. You’ll need to deliver a completed form to the chamber office where they will stamp and sign it for you.
More and more companies are foregoing the time-consuming process of relying on expensive courier services or taking the time to hand-deliver a certificate of origin to a chamber of commerce for certification and are relying on electronic certificates of origin (eCO) for their shipments. An eCO is often quicker to turn around, allows you the option of delivering the certificate electronically to the importer, and can be registered with the International Chamber of Commerce to provide added credibility.
Country-Specific Certificates
In addition to the generic certificate of origin form, there are also country-specific certificates of origin. The United States currently has signed 14 free trade agreements with 20 different countries in which U.S. goods are eligible for reduced or zero duty rates when imported into those countries. Some free trade agreements, including the United States-Central America-Dominican Republic Free Trade Agreement (CAFTA-DR), cover multiple countries, including the U.S. In our article When to Use a Certificate of Origin Form for Your Exports, you’ll find links to country-specific certificates.
On July 1, 2020, the United States-Mexico-Canada Agreement (USMCA) replaced the NAFTA agreement between the three countries. You’ll find the differences between the two free trade agreements in the article NAFTA vs. USMCA: The North American Free Trade Agreement and the U.S.-Mexico-Canada Agreement.
5. Certificate of Free Sale
Sometimes called a “Certificate for Export” or “Certificate to Foreign Governments,” a Certificate of Free Sale is evidence that goods—such as food items, cosmetics, biologics or medical devices—are legally sold or distributed in the open market, freely without restriction, and approved by the regulatory authorities in the country of origin (the United States).
A Certificate of Free Sale is used when you are registering a new product in a country. You’re essentially informing the customs authority in that country, “This is a new thing I’m going to start importing, and here are my support documents that confirm this product(s) is legal to sell in the country of manufacture.”
If your international customer requests a Certificate of Free Sale, you can easily apply for a certificate online (there’s no cost or obligation for registering).
6. Shipper’s Letter of Instruction
One of the most important people you will work with in the export process is your freight forwarder, who usually arranges the transport of your goods with a carrier and helps ensure you’ve taken care of all the details.
Depending on your agreed-upon terms of sale—remember, that’s typically the Incoterm you choose—either you hire a freight forwarder to work for you, the exporter, or, in the case of a routed export transaction, the buyer hires a freight forwarder.
Regardless of who hired the forwarder, it’s important you provide a Shipper’s Letter of Instruction (SLI) with all the information needed to successfully move your goods. (Here are several good reasons why a letter of instruction is necessary.)
I often describe the SLI as a cover memo for your other export paperwork. Depending on whether or not the forwarder works for you, the SLI may include a limited Power of Attorney, providing authority to act on your behalf for this shipment. Learn more about how to fill out an SLI here.
AES Concerns
Depending on who hired the forwarder, the SLI may also grant the forwarder permission to file the export information electronically through the Automated Export System (AES). Most exports valued at more than $2,500 per item must be submitted to customs via AES, which makes filing through AES an important consideration for many exporters.
If the freight forwarder is hired by the buyer, then the forwarder typically does the AES filing. Even if you, as the seller, hire the forwarder, you may pay the forwarder to do the AES filing on your behalf.
In either case, even if you aren’t doing the AES filing yourself, you are legally required to provide certain data elements to the forwarder for filing purposes; this is usually done via SLI. As an aside, I strongly believe that you, as the exporter, should almost always be the party that does the AES filing—even in a routed export transaction where the buyer picks a forwarder.
It’s simple to file the documents needed for shipping through AES, and doing it yourself gives you more control over the process. More and more of our clients are assuming that responsibility for every export shipment for just that reason—get a step-by-step guide to filing here.
However, I understand that many companies do rely on a freight forwarder for their AES filings, so an accurately completed SLI is very important.
7. Inland Bill of Lading
An inland bill of lading is often the first transportation document required for international shipping created for your export. It can be prepared by the inland carrier or you can create it yourself. It’s a contract of carriage between the exporter and the shipper of the goods that states where the goods are going; it also serves as your receipt that the goods have been picked up.
In an international shipment, the inland bill of lading is not typically consigned to the buyer. Instead, it is consigned to the carrier moving the goods internationally or, if not directly to the carrier, to a forwarder, warehouse or some other third party who will consign your goods to the carrier when ready.
8. Ocean Bill of Lading
If your goods are shipping by ocean vessel, you’ll need an ocean bill of lading. An ocean bill of lading can serve as both a contract of carriage and a document of title for the cargo. There are two types:
Straight Bill of Lading
A straight bill of lading is consigned to a specific consignee and is not negotiable. The consignee takes possession of the goods by presenting a signed, original bill of lading to the carrier.
Negotiable Bill of Lading
A negotiable bill of lading is consigned “to order” or “to order of shipper” and is signed by the shipper and sent to a bank in the buyer’s country. The bank holds onto the original bill of lading until the requirements of a documentary collection or a letter of credit have been satisfied.
9. Air Waybill
Goods shipped on a plane require an air waybill. It is a contract of carriage between the shipper and the carrier that is distributed by the International Air Transport Association (IATA). Unlike an ocean bill of lading, an air waybill cannot be negotiable.
The purpose of an air waybill differs from the purpose of a bill of lading:
An air waybill is a receipt of goods; the carrier or agent sends it in order to show the place of delivery.
A bill of lading is a document of title to goods. It is a receipt by the shipping company with an agreement to deliver the goods at the destination only to the party the bill of lading is consigned to.
10. Dangerous Goods Forms
If your products are considered dangerous goods by either the International Air Transport Association (IATA) or the International Maritime Organization (IMO), you need to include the appropriate dangerous goods form with your shipment. Shipping dangerous goods or hazardous materials can be tricky. Before you do it, the appropriate people at your company need to be trained to properly package, label and document these shipments.
The IATA form—the Shipper’s Declaration for Dangerous Goods—is required for air shipments. There is a different version of the form for ocean shipments. Again, these forms need to be completed by someone who has been trained to handle dangerous goods shipping.
11. Bank Draft
A bank draft is an important part of the international sales process for transferring control of the exported goods from the seller in exchange for funds from the buyer. It is often called a documentary collection, because the seller attaches various documents to a bank draft and a cover letter.
Usually the seller’s bank will send the bank draft and related documents via the freight forwarder to the buyer’s bank or a bank with which it has a relationship in the buyer’s country. When the buyer authorizes payment for the goods, the buyer’s bank releases the documents to the buyer and transfers the funds to the seller’s bank.
The bank draft may or may not include a transmittal letter, which includes details of the bank draft transaction, including the types of additional documents that are included and payment instructions.
I love selfies as much as the next gal, but they’re not the most effective way to present your #OOTD.
Since it’s not like you can show off your outfit at a party right now, you’re going to have to get creative. While we are all still (mostly) stuck at home, now is the time to try out some new photoshoot ideas.
We’ve got plenty of tips and tricks for creating the perfect backdrop, lighting, and more, all while in the safety of your own space!
Backyard Backdrop
The only photoshoot tip you really need is: find natural light. The best way to do that? Step outside, of course!
Even if you don’t have a perfectly manicured yard, there are likely plants, outdoor furniture, or neat walls around for posing.
No outdoor space whatsoever? Walk down your street and you’re bound to run into a cool spot. Or, find a blank wall in your home in front of a window and decorate with your largest indoor plants. Voila!
Tips & Tricks:
Find a field of flowers or trees to get more detail and depth in your photos.
Find colors that compliment you and are guaranteed to make your outfit pop.
Bring the Indoors Outdoors
Let’s face it; the mirror selfie was getting boring.
Thanks to TikTok influencers, they’ve switched up the game by bringing a mirror outdoors for the coolest fashion snaps. This is hands down one of the neatest at home photoshoot ideas we’ve seen lately.
This simple, but creative challenge grew into a really great way to capture some cool shots. Why stop at a mirror? Bring some fun indoor items into your outdoor space and stage a full shoot.
Tips & Tricks:
To avoid blinding yourself with any harsh lights, angle the mirror so you don’t have the sun directly shining on your face. This is *very* important.
Big, statement mirrors work best for this.
Lighting Games
If you don’t have a lot of natural light where you live or want to create a more abstract look to capture your ‘fit, this other TikTok challenge might suit your needs.
All you need is your phone, a roll of toilet paper, and some tape – that’s it! Set your phone in a place that will capture your shot and tape the roll over the flashlight of your phone to create a small spotlight.
All that’s left is for you to smile and pose!
Tips & Tricks:
The self-timer on your phone will help you capture the perfect picture.
Adding a small piece of holographic paper or even a crystal in front of the camera lens can add funky effects.
Mini Studio
You do not have to own a fancy camera or expensive backdrops to create a studio for yourself.
One of the easiest and most effective ideas for creating this photoshoot look at home is to use bed sheets. You can hang them up anywhere and bring in the props of your choice.
If you have large windows or some natural light, I recommend setting up somewhere near there (just not directly in front).
Natural light will make your photos feel bright and airy and help if you don’t have any fancy studio lights.
Tips & Tricks:
White sheets are the best option to give the illusion of space and will make any of your outfits pop.
Push pins or small clips with tape are also an easy way to hang up your sheets without causing any damage to your walls.
Polaroid Party
Out of at home photoshoot ideas? There is nothing more charming than a Polaroid photo!
The magic of a Polaroid is the simplicity and the fact that they’re not perfect. Yes, play around with staging and props, but don’t overthink it.
Tips & Tricks:
Avoid shooting with direct light as this can blow out your photo. Instead keep the light slightly behind you or at your side to get the best results.
Don’t be afraid to bring the camera closer towards you! A Polaroid lens captures a very different shot than a phone camera.
Windows for Days
Instead of just using a window for light, try posing next to one.
If you’re out of ideas about how to make this at home photoshoot feel more unique, move your bed or couch near one to create a cozier atmosphere.
You can always change it up by adding more plants to your scenery, bringing in different chairs, and other fun props.
Tips & Tricks:
Shoot these images during sunrise or sunset. You will get some beautifully vibrant colors and the photos won’t turn out completely dark either.
Don’t be afraid to open up the window and pose within the frame, rather than around it.
Play with POV
If you’re looking to capture a detail-orientated photo rather than a full-outfit shot, switch around your perspective.
This could mean an up-close glimpse at accessories or one item, or a flatlay of your outfit.
If you’re going the flatlay route and don’t have a clue where to begin, don’t fret, we have a guide on how to do it properly.
Tips & Tricks:
Find a background that will add style to your look while also complimenting your outfit details.
Product photography is much more than pack shots and white backgrounds – although those are essential for almost every eCommerce platform. One of the powers of photography is its creativity and range, and this can be used in product photography just as much as in any other photographic genre.
Some products need an outdoor shoot, but many more will benefit from it.
Scroll down now and read about:
Which products benefit from an outside shoot
Why it is more challenging
Extra equipment that may be needed
Why it is all worth it
So here are tips to help you get the more out of taking you eCommerce product photography outdoors.
Will your product benefit from an outside shoot?
Whilst you will almost always need some studio shots or plain backdrop shots for your products (some eCommerce platforms insist on it), many products will benefit from an outdoor photoshoot as well.
Anything that belongs outside or is used outdoors should be the first items on this list.
Cars, gardening tools, outdoor clothing and barbeques are just a few things that spring to mind from what turns into an almost unending list once you start to think about it.
But aside from these, many other products will benefit from an outside shoot as well.
Think about products with natural ingredients – soaps, shampoo, skincare. Food products – natural products or food items made with natural ingredients.
Many healthcare products are promoted now because of their nature-loving content.
Ecologically friendly ‘green’ products also fit into this group. In fact, almost any product looks good in an outdoor, natural environment! And that’s without starting to mention products that look great un urban settings!
Outdoor product photography will benefit almost any product; there is something very appealing about any connection to the outdoors and if there is one, it should be highlighted in your photographs.
The more you take a moment to stop and think about it, the more you could add to this list. So take a few moments to think about your products and how this may benefit them.
Outdoor product photography is a challenge
Photography is about understanding the interplay of light and shadows and how they interact to produce ranges of colours and tones. And there is no getting away from the fact that outdoor product photography presents very different challenges to studio shots. When shooting outside, you are working with natural light (predominantly, at least).
Photographing your products during the ‘Golden Hour’ (dawn and dusk) will give you a softer light to work with, whereas during the main daytime hours the light will be harsher and create deep shadows.
Make sure the light is to one side of your products, not in front of them. Even with the sunlight behind them (facing the camera) can work, but can produce a hazy effect, depending on its strength and the angle you are shooting at, so this is best avoided unless it’s the look you are wanting.
If the sunlight is too harsh, it can be softened using a diffuser – a screen that will soften the light for you. If some of your product is still in deep shadow, then you can use a reflector to throw extra light from the direction opposite the sun.
Much outdoor photography is done using a combination of both of these, in conjunction with a lot of manual adjustments to the camera settings to adapt to the available light conditions. For a professional outdoor photoshoot – this is one of those times that the single best option is to hire a professional product photographer.
They will understand how to control the light and get all the keys shots that you want and that your products deserve. Make sure you engage a professional with experience and knows what they are doing – this means they will already have all the equipment that is needed also.
Discuss what you want with your photographer before the appointment and – although the customer is always right – in this case, try and be as adaptable as possible around shoot times, because if the professional says early morning will make a real difference – that’s because it will.
Regardless of perfect times (not always possible, of course), you can be confident that a professional product photographer will do the best job possible, whatever the light conditions.
The benefits of outdoor product photography
We’ve already mentioned a few – but if outdoor photography can be a challenge, why bother?
Here are just a few reasons:
An outdoor photoshoot will make your product stand out from all the other similar items that have only been photographed in a studio. They will get you noticed.
Outdoor product photography can show scale, by having your product being worn or being photographed next to something else – even a building!
There are many more ways to get creative with in-context or lifestyle shots than if you are restricted to a studio; you can show your product being used in real-life situations.
Products with natural ingredients or components look great in natural settings.
You have a limitless choice of backgrounds – so there is definitely one that will make your product look perfect!
If you want a promote a ‘natural’ message you have an endless supply of props and extras – literally everything that nature provides.